The first time the cliffs of Zion appear on the horizon, they do not sneak up. One second the road rolls through muted desert, the next those massive sandstone walls rise out of the earth, glowing red and gold. For anyone who loves big views and big ideas, it feels less like a drive and more like stepping into a giant open-air gallery.

For many travelers, an escape from Las Vegas means shows, shopping, maybe one quick bus ride to a viewpoint. For a different kind of explorer, the real prize is trading neon for starlight and slot machines for slot canyons. That is where iconic road trips centered on Zion come in: long open roads, empty trailheads at sunrise, and a camera card full of images that do not look like anyone else’s feed.

“You don’t take a photograph, you make it.”
— Ansel Adams

This guide treats a Zion National Park road trip as the anchor of a bigger Southwest route. Think of it as a living storyboard: Zion’s main canyon and Route 9, quiet corners like Kolob Canyons and East Zion, then onward to Bryce Canyon and the hoodoos of Scenic Byway 12. It is written for creative professionals who want more than a packaged tour – people who want time, space, and privacy to explore at their own pace.

With Discover It Yourself, that freedom becomes very real. You pick up a premium 4×4, receive carefully chosen coordinates for secret spots around Las Vegas and beyond, and head out with nothing but keys, maps, and a flexible plan. No guide hurrying the group, no microphone narrating every step, just a self-guided road trip that you direct.

Stay with this guide and you will walk away with a complete Southern Utah road trip plan: when to visit by car, how to move smoothly with Zion’s shuttle system, which scenic drives and hikes are worth your time, and how to connect Zion with Bryce Canyon and other nearby highlights. Consider this your field manual for iconic road trips with Zion at the center.

Key Takeaways

  • The most rewarding timing for an iconic road trip with Zion as the anchor is usually spring or fall. Weather is mild, crowds are smaller, and light is beautiful for photography, while summer works best for water hikes if you start very early and respect the heat.
  • Springdale and Kanab play different roles in a Utah road trip itinerary. Springdale works best if the focus stays on Zion, while Kanab shines as a central base for a multi-park route that includes Bryce Canyon, Lake Powell, and remote slot canyons.
  • Vehicle choice changes the entire experience. A premium 4×4 from Discover It Yourself opens rougher side roads, remote trailheads, and quiet viewpoints that standard rental sedans cannot safely reach, giving far more privacy and flexibility.
  • Mastering the Zion Canyon Scenic Drive shuttle system turns a potential headache into a smooth, relaxing day. Knowing when shuttles run, where they stop, and how to time rides lets you move between trailheads without stress.
  • Zion is the starting point for a wide Southwest national parks road trip. With the right plan, you can connect road trips from Las Vegas to Zion, continue to Bryce Canyon, explore parts of the Utah Mighty 5, and even reach Lake Powell and Page.
  • Smart preparation matters in the desert. Layers, strong sun protection, hiking sandals for wet trails, and more water than you think you need keep the focus on creativity and exploration rather than damage control.
  • Discover It Yourself’s self-guided model supports independence. You receive keys and coordinates, not a script, so every day can adjust to the light, the weather, and whatever sparks your curiosity.

Planning Your Zion National Park Road Trip [Strategic Preparation]
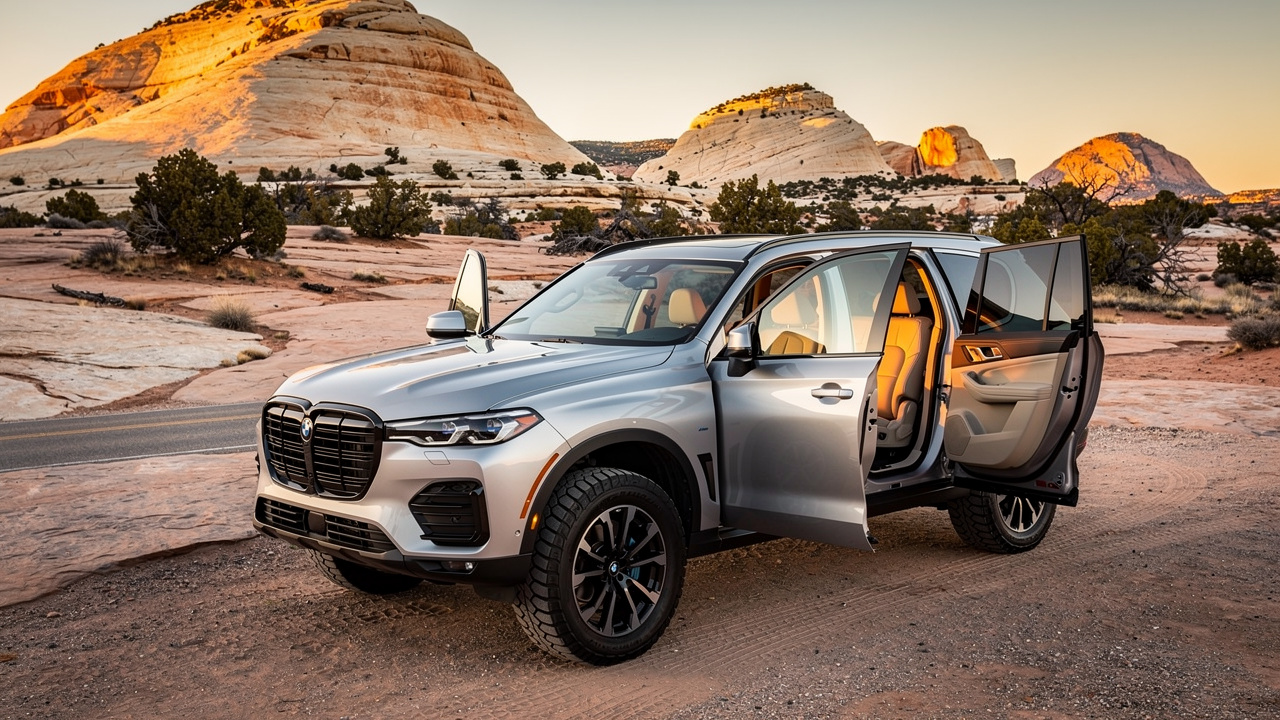
Premium 4x4 vehicle at desert trailhead

A great Zion road trip does not start at the park gate; it starts weeks earlier with a notebook, a calendar, and a rough map of Southern Utah. Timelines, starting city, and base camps all shape how the route feels on the ground. A little thought up front means more time actually exploring and less time sitting in traffic or scrambling for last-minute lodging, and research shows that attitudes toward wilderness experiences significantly influence visitor satisfaction and behavior patterns.

For many, this route begins with road trips from Las Vegas to Zion. That first long stretch on Interstate 15 feels like a reset button. Leaving the Strip behind, the mind has time to slow down before the terrain begins to rise and shift near St. George and Springdale. Creative professionals often describe this drive as where ideas start to breathe again.

Planning also means being realistic about desert conditions. Heat, altitude, and long distances between gas stations are part of the experience. A premium 4×4 from Discover It Yourself helps here too. High clearance and strong tires handle rough side roads with much less stress, while larger fuel tanks give a wider margin in remote areas.

“Of all the paths you take in life, make sure a few of them are dirt.”
— John Muir

Best Time To Visit Zion By Car [Seasonal Strategy Guide]

When someone asks about the best time to visit Zion by car, the honest answer is that it depends on priorities:

  • Spring (March–April)
    Snowmelt-fed waterfalls, fresh green along the Virgin River, and daytime highs in the 60s to low 80s make this season appealing. Crowds grow, but they feel manageable, and soft light plus dramatic clouds often make this the sweet spot for photographers.
  • Summer (May–September)
    Long days and access to classic water hikes like The Narrows come with air temperatures that can reach 95–110°F. Mid-day hikes in direct sun are a bad idea. Early starts and late afternoon adventures work far better, and hiking sandals plus constant hydration move from “nice to have” to “non-negotiable.”
  • Fall (October–early November)
    This may be the most balanced time for many travelers. Higher areas around Kolob Canyons and Cedar Breaks show golden aspens, Zion’s main canyon cools down, and trail traffic thins out. Colors, crisp air, and comfortable temperatures make it a standout season.
  • Winter (late November–February)
    Winter has its own quiet magic with snow on red cliffs and open parking lots, but some higher roads close and shuttle service scales back. Shorter days and colder mornings require more layers, yet reward you with peaceful trails and clear night skies.

For creative professionals balancing time off, project schedules, and light conditions, spring and fall usually hit the sweet spot.

Gateway Cities And Starting Points [Las Vegas To Zion Route Planning]

Most iconic road trips with Zion as the centerpiece start at an airport. Las Vegas, with Harry Reid International Airport, sits about two and a half hours from Springdale and around three hours from Kanab. That makes it a natural launch point for self-guided adventures, especially when you can pick up a Discover It Yourself 4×4 and roll straight from the terminal toward open desert.

This contrast from the Strip to empty desert is part of the fun. One moment the car is surrounded by billboards and hotel towers; less than an hour later, the view is all open sky and cliffs. For many visitors, this is the real Nevada experience, a reset that a shuttle bus tour never offers.

Salt Lake City is another option, roughly a five-hour drive south to Zion. It works well for a Utah road trip itinerary that includes the Mighty 5 parks in a longer loop. St. George Regional Airport sits much closer to Zion and Springdale, though flights are fewer and often pricier. For travelers who want the maximum mix of flexibility and access to hidden spots, Las Vegas plus a Discover It Yourself pickup remains the strongest starting point, with route choices ranging from direct Interstate 15 to scenic routes through Virgin and Rockville.

Essential Packing List For Southwest Desert Adventures

Packing for Southern Utah calls for a balance between minimalism and respect for the elements. Days can be hot and dry, nights can drop into hoodie weather, and every extra pound in the pack matters once hikes begin to climb.

Consider this core packing list for a Zion and Bryce Canyon road trip:

  • Clothing Layers
    • Breathable short- and long-sleeve shirts
    • A light insulating mid-layer (fleece or thin puffer)
    • A packable windproof or rain jacket
  • Footwear
    • Broken-in hiking boots for rocky trails
    • Hiking-ready sandals (Tevas, Chacos, or similar) for water hikes and camp use
    • Comfortable shoes for driving and town days
  • Day-Hike Essentials
    • Small day pack
    • Refillable water bottle or hydration bladder (aim for at least 2–3 liters per person on hot days)
    • Salty snacks and quick calories
    • Basic first aid kit
    • Headlamp with fresh batteries
    • Battery pack and cables for phone and camera gear
  • Sun And Weather Protection
    • High-SPF sunscreen and lip balm
    • Wide-brimmed hat
    • UV-rated sunglasses
  • Creative Gear
    • DSLR or mirrorless camera body
    • Wide-angle lens for canyons and night skies
    • Sturdy but compact tripod
    • Polarizing filter to deepen skies and cut glare on water
  • Water-Friendly Items
    • Swimsuit and light towel
    • Dry bag for electronics on The Narrows or at reservoirs

Desert sun is intense even on cooler days, so sun protection and hydration are non-negotiable, a principle that aligns with sustainable outdoor practices discussed by environmental researchers at the Voices Blog – Yale Sustainable Food Program. For creative professionals, this region doubles as a working studio, so it is worth protecting your eyes, your skin, and your gear.

Mastering The Zion Canyon Scenic Drive [Iconic Route 9 Experience]

The Zion Canyon Scenic Drive is the spine of almost every first-time visit. The Virgin River threads along the road, while cliffs soar thousands of feet above. On a busy day it can feel like the center of the national park world, but with the right strategy it also becomes a calm, car-free corridor that you can treat as a moving base camp.

From March through November, and again during late-December holidays, private cars cannot drive this road. Instead, a free shuttle system carries visitors from the Visitor Center up the canyon. Some travelers see this as a limit, but the shuttle often makes life easier, freeing drivers from the stress of tight pullouts and constant traffic.

The key is to treat the shuttle as part of your Zion National Park driving tour, not just a way to move bodies. Combine early boarding times with a flexible hiking plan and you can see sunrise on cliffs, hike a classic trail, and still have time for quiet riverside stops later in the day. Meanwhile, your Discover It Yourself 4×4 waits outside the main canyon, ready for an afternoon run to East Zion, Kolob, or nearby state parks.

Navigating The Zion Shuttle System Like A Pro

The Zion shuttle is simple once the pattern clicks. During the main season, buses usually start running around 6:00 AM and continue into the evening, with exact times posted on the National Park Service site, and staying informed through resources like News – The Water Desk helps travelers understand broader environmental conditions affecting park access. Shuttles leave every few minutes from the Visitor Center, stopping at:

  • Human History Museum
  • Canyon Junction
  • Court of the Patriarchs
  • Zion Lodge
  • The Grotto
  • Weeping Rock
  • Big Bend
  • Temple of Sinawava

A few practical habits make the system feel smooth:

  • Aim to catch a bus before 8:00 AM or later in the afternoon after 3:00 PM to avoid the longest lines.
  • Use the earliest rides for big hikes or important photo sessions, when light is soft and trailhead crowds are thin.
  • During peak hours, shuttles still move often (usually every 7–10 minutes), but build in extra time for queues at the Visitor Center and major stops.

For creative professionals, that early ride often delivers the best images and the clearest thinking of the day.

Must-Experience Stops Along The Scenic Drive

Every stop along the Zion Canyon Scenic Drive has its fans, but a few deserve special focus when time is short:

  • Court Of The Patriarchs
    A quick, high-return stop with a short path to a viewpoint of three dramatic peaks – Abraham, Isaac, and Jacob – above the river. The scene feels almost sculpted and photographs well in both morning and late-day side light.
  • Zion Lodge & Emerald Pools Access
    Roughly in the center of the canyon, Zion Lodge offers a grassy lawn, food, restrooms, and access to the Emerald Pools trail system. This makes it a natural mid-day base: grab a drink, rest in the shade, then head out for an easy walk to Lower Emerald Pool or a longer loop if energy allows.
  • The Grotto
    One stop farther, The Grotto is the launch point for Angels Landing and the West Rim Trail. Picnic tables tucked among cottonwoods make it a pleasant place to sit beside the river, even if you are not climbing to the summit.
  • Weeping Rock (Status-Dependent)
    Weeping Rock remains closed due to rockfall as of this writing, so always check current conditions. When open, it offers a short walk to hanging gardens under a dripping alcove.
  • Temple Of Sinawava
    The final shuttle stop and gateway to the paved Riverside Walk and then The Narrows. The wide river bend, high walls, and shaded path make this a favorite even for non-hikers.

For photographers, almost every stop provides a new way to frame cliffs and river, but the key is to choose a few and sink into them rather than trying to rush all nine in one day.

Zion-Mount Carmel Highway And The Historic Tunnel

While the shuttle handles the main canyon, Route 9 continues east as the Zion-Mount Carmel Highway, open to private vehicles. This stretch climbs out of the canyon via tight switchbacks, then passes through the famous Zion-Mount Carmel Tunnel, a 1.1-mile passage carved through solid sandstone in 1930. Driving through it feels like entering a different realm, with small windows cut into the tunnel wall hinting at the drop outside.

Because the tunnel is narrow, large vehicles need special handling. Oversized RVs, buses, and some trucks pay a fee so rangers can stop traffic and allow them to pass through the center lane. That system ends for big rigs on June 7, 2026, when oversized vehicles will be routed away from this section altogether. For normal passenger vehicles and 4x4s from Discover It Yourself, the drive remains straightforward.

Just outside the tunnel, several pullouts give access to dramatic overlooks and the start of the Canyon Overlook Trail. The tunnel also marks a visual shift: on the west side, the canyon feels tight and vertical; on the east side, the road winds through open slickrock and pale domes, setting the stage for East Zion.

Iconic Hikes From The Zion Canyon Floor [Trail Guide For Adventurers]

Zion’s main canyon is not just about views from the road. It is a trail hub, with routes that range from mellow riverside strolls to exposed scrambles on narrow ridges. This mix allows a group to split up by comfort level or lets one person design different kinds of days over a longer stay.

For creative professionals who think in stories and sequences, each hike offers a different “chapter” of the trip. The Narrows feels like walking inside a stone hallway of reflections. Angels Landing feels like scaling the spine of a giant creature. Emerald Pools shows how water softens the desert, while the West Rim Trail climbs into an entirely different high-country world.

The key is to match hikes to time, fitness, and weather, then stack them in a way that leaves enough energy for the rest of the road trip. No single day needs to be a sufferfest; a Zion National Park road trip works better as a series of strong, balanced days that leave room for sunrise shoots and late-night stargazing.

The Narrows Bottom-Up Experience [Wading Through A Slot Canyon]
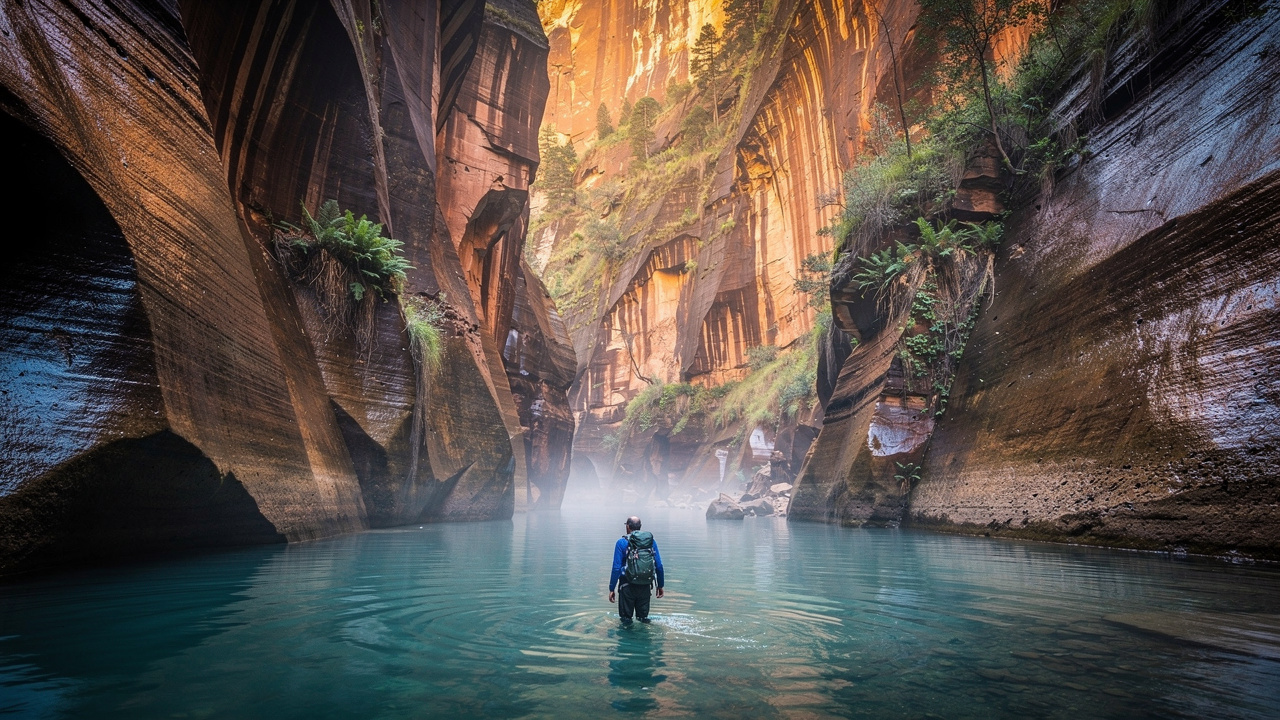
Hiker wading through Zion's Narrows slot canyon

The Narrows is Zion at its most famous and, for many, its most memorable. From the Temple of Sinawava shuttle stop, the Riverside Walk leads a comfortable 1.1 miles along the river. At the end of the pavement, the real adventure begins as the path disappears and the river itself becomes the trail.

Hikers step into cool water that often reaches mid-calf and sometimes higher, weaving between massive rock walls that rise more than a thousand feet overhead. Progress is slow but absorbing, with every bend revealing new light and shapes. This bottom-up version can be as short as a half-mile taste of the canyon or as long as a 10-mile round trip to Big Spring for very fit visitors.

Good footwear matters here. Closed-toe water shoes or sandals with strong grip, neoprene socks in colder months, and a sturdy walking stick all reduce slips and bruises. From late spring through early fall, conditions tend to be best, though summer thunderstorms can create dangerous flash floods. Rental shops in Springdale provide Narrows-specific gear, and photographers often add a dry bag to protect camera bodies and lenses from the constant spray.

Angels Landing Challenge [Permit-Required Peak Experience]

Angels Landing is the hike that often appears on posters and park brochures, and for good reason. Starting at The Grotto shuttle stop, the trail climbs steep pavement, then enters a series of tight switchbacks known as Walter’s Wiggles. This first part brings hikers to Scout Lookout, a stunning perch with wide views up and down the main canyon.

For many, Scout Lookout is the perfect endpoint: roughly four miles round trip, a serious workout, and world-class views with no need to grip chains. The final half-mile from Scout Lookout to the actual summit of Angels Landing is now permit-only and far more exposed. The path narrows to a rocky spine with steep drops on both sides, and a chain bolted into the rock offers something to hold as you move.

Permits work through a lottery system, either long in advance or for the day before. Even with a permit, this section is not for everyone. Honest self-assessment of comfort with heights, footwork on rock, and overall fitness is essential. Early morning starts help avoid both crowds and heat, and for those who reach the summit, the reward is one of the most famous views in the national park system.

Emerald Pools Trail Network [Waterfall Oasis In The Desert]

The Emerald Pools area sits just across the road from Zion Lodge and feels like a natural extension of an afternoon rest stop. Trails here link three separate pools with rising difficulty. The Lower Emerald Pool is an easy 1.2-mile round trip on a mostly paved path, passing under a thin waterfall that creates a cool, misty alcove lined with hanging plants.

From there, paths branch upward to Middle and Upper Emerald Pools. These routes include steeper sections and rock steps but repay the effort with quieter nooks, reflective water, and impressive walls around the upper basin. In spring, when water flows are strongest, even the lower trail feels lush compared to much of the park.

Families with young children often stick to the lower pool, while more active travelers turn the network into a loop by linking the Kayenta Trail from The Grotto. Morning or late afternoon visits offer softer light and fewer people, making it easier to slow down and notice details.

West Rim Trail To Cabin Spring [High Country Solitude]

For hikers who want to leave the crowds below without committing to a backpacking permit, the West Rim Trail up to Cabin Spring is an excellent choice. It shares its first switchbacks with Angels Landing, then splits off onto a longer, steadier climb into the high country.

As the trail gains height, the environment shifts from canyon floor shrubs to open slopes and then to ponderosa pine stands. Views back into the main canyon stretch wider with each bend, and the sense of space grows. The round trip to Cabin Spring runs around 6–7 miles with significant elevation gain, so it fits best on a full hiking day with cooler weather. In return, traffic thins out dramatically once past the Angels Landing junction.

Exploring East Zion: Beyond The Main Canyon [Highway 9’s Hidden Treasures]

East Zion often surprises people. After the tunnel, the road leaves tight canyon walls and flows through pale domes, slickrock waves, and the famous cross-hatched face of Checkerboard Mesa. Many visitors drive this section once, on the way in or out, without really stopping. For someone on an iconic road trip with Zion as the focus, that would be a missed chance.

This section is open to private vehicles year-round and has far fewer visitors than the main canyon. Pullouts line both sides of Highway 9, offering quick access to viewpoints, informal scrambles, and short hikes. That flexibility pairs perfectly with a Discover It Yourself 4×4, since you can easily time this area for the best light and pull over wherever inspiration strikes.

For photographers and other creatives, East Zion is like a studio filled with ready-made sets. Textures, repeating lines, and clean horizons all encourage experimentation. The absence of a shuttle schedule or tight parking restrictions makes it easier to stay put when the light suddenly gets interesting.

Canyon Overlook Trail [Best Short Hike In The Park]

Just east of the Zion-Mount Carmel Tunnel, a small parking lot on the south side of the road marks the start of the Canyon Overlook Trail. In one mile round trip, this path manages to pack in almost everything people love about Zion, without the crowds and exposure of the more famous hikes.

The trail begins with stairs and a brief climb, then winds along ledges and through shallow alcoves. Parts of the route cross open rock with drop-offs, but railings or rock walls provide a sense of security in the most exposed spots. Children who are used to hiking and comfortable on uneven ground often enjoy it, though close supervision is important.

At the overlook, the view opens suddenly into a grand panorama of Pine Creek Canyon and the upper reaches of main Zion Canyon. You can see the switchbacks that carry Route 9 up from the valley floor, along with towers and mesas beyond. Sunset here is outstanding as cliffs catch warm light, but early morning can be quieter and cooler. Bighorn sheep sometimes appear on slopes nearby, so keep an eye on the ridges.

Checkerboard Mesa And East Zion Geology
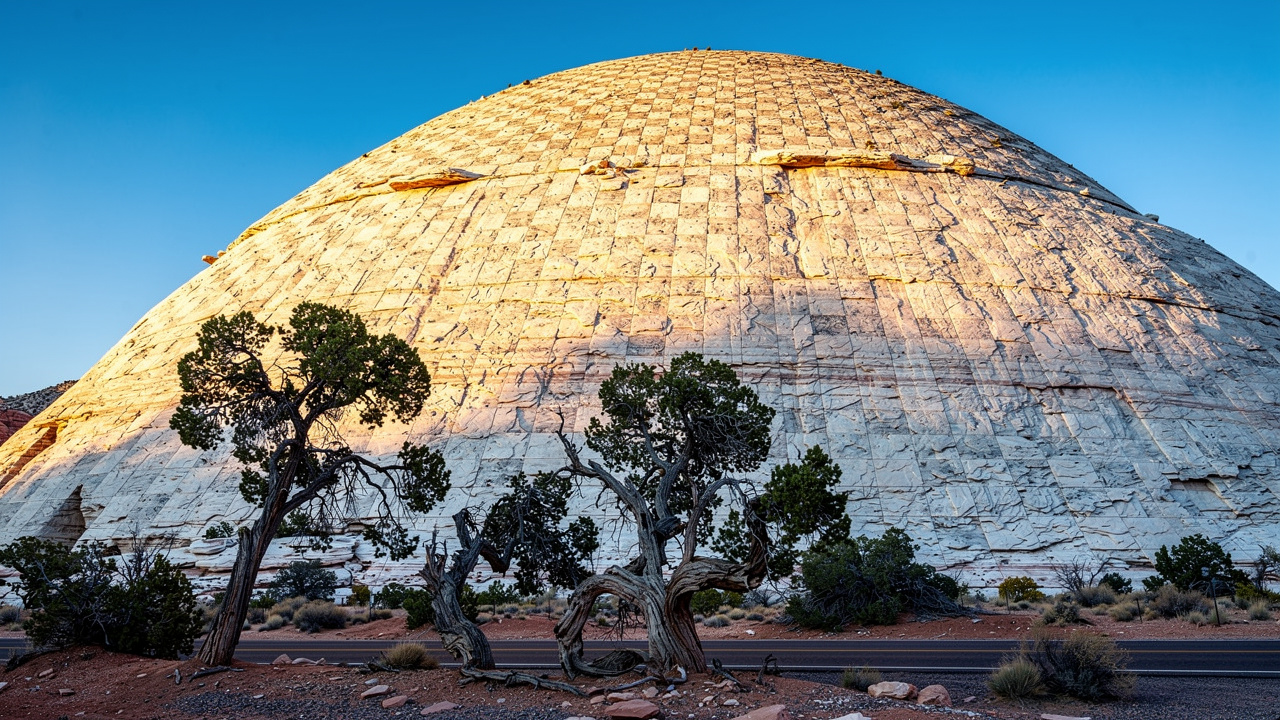
Checkerboard Mesa's distinctive geological patterns

A bit farther east, Checkerboard Mesa rises beside the road like a giant sandstone dome etched with a grid. The cross-hatched pattern comes from two natural processes. Vertical cracks form as rock expands and contracts over seasons, while horizontal lines trace the ancient layering of Jurassic-era sand dunes frozen in place.

Several pullouts allow safe viewing and photography without much walking. The area around the mesa showcases pale white Navajo sandstone, a strong contrast to the red rock found lower in the main canyon. This shift in color and shape helps tell the story of changing deserts long before humans showed up.

For anyone who likes abstract compositions, close-up shots of Checkerboard Mesa’s lines and textures can be just as satisfying as wide views. The pale stone responds well to soft morning and evening light, which emphasizes subtle shadows instead of harsh midday glare.

Clear Creek Slickrock Playground [Off-Trail Exploration]

Along much of Highway 9 on the east side, a dry wash called Clear Creek parallels the road. At various pullouts, you can step down into this drainage and wander among smooth rocks, shallow slots, and potholes that fill with water after storms. There is no formal trail here, which is exactly the point.

Families often treat Clear Creek as a natural playground, scrambling up small ledges, hopping across pools, and exploring side gullies. Because the floor is mostly solid rock, it avoids fragile soils and plants, as long as visitors stay off the darker crusty patches on the edges. Kids who might protest a “hike” on a named trail usually forget to complain once they start exploring here.

After summer monsoon storms or spring runoff, the so-called “many pools” hold reflections of the sky and surrounding rock. For creative professionals, these small basins offer endless chances to play with symmetry, reflections, and leading lines. Just remember to respect the setting: puddles can host tiny animals and plants, so move around them gently.

Kolob Canyons Scenic Drive [Zion’s Quieter Northwest Corner]

Kolob Canyons feels like a secret chapter of Zion. Tucked off Interstate 15 about 40 miles north of the main entrance, it has its own gate, visitor center, and five-mile scenic drive. Many visitors never make it here, which is exactly why it belongs in a serious Southern Utah road trip guide.

Instead of one big canyon, the Kolob area features a series of long, narrow “finger” canyons cut into the edge of the Colorado Plateau. Red walls soar above forested floors, and the air often feels cooler thanks to higher elevation. For someone who likes to work or think in quiet spaces, this side of the park offers rare stillness.

Because the road ends in a dead end at Timber Creek Overlook, traffic stays light. There are no lodges or stores inside this part of the park, just a small visitor center, trailheads, and viewpoints. It fits naturally as a half-day side trip on a road trip from Las Vegas to Zion or as a peaceful pause between busier days in the main canyon and Bryce.

The Kolob Canyons Road Experience [5-Mile Drive To Timber Creek]

The Kolob Canyons Road begins right after the small entrance station and climbs more than a thousand feet over five miles. The pavement is smooth and suitable for any normal vehicle, though snow and ice can change that in winter. Almost immediately, pullouts appear with views into the first of the finger canyons.

These “fingers” are long, narrow canyons running roughly north to south, separated by high ridges that form the “back of the hand” above. From each viewpoint, you look into one of these slots from the side, seeing both the red walls and the green floors lined with trees and shrubs. Light changes quickly here; early sun lights up the eastern walls, while late afternoon shifts focus to the western sides.

Stopping at multiple pullouts, rather than just speeding to the end, lets the variety of shapes and colors register. The road passes through pinyon-juniper woodland, and certain bends open long views toward the Pine Valley Mountains. Plan at least an hour for this drive, more if you like to stop often for photos or short walks.

Timber Creek Overlook Trail [Panoramic High Country Vista]
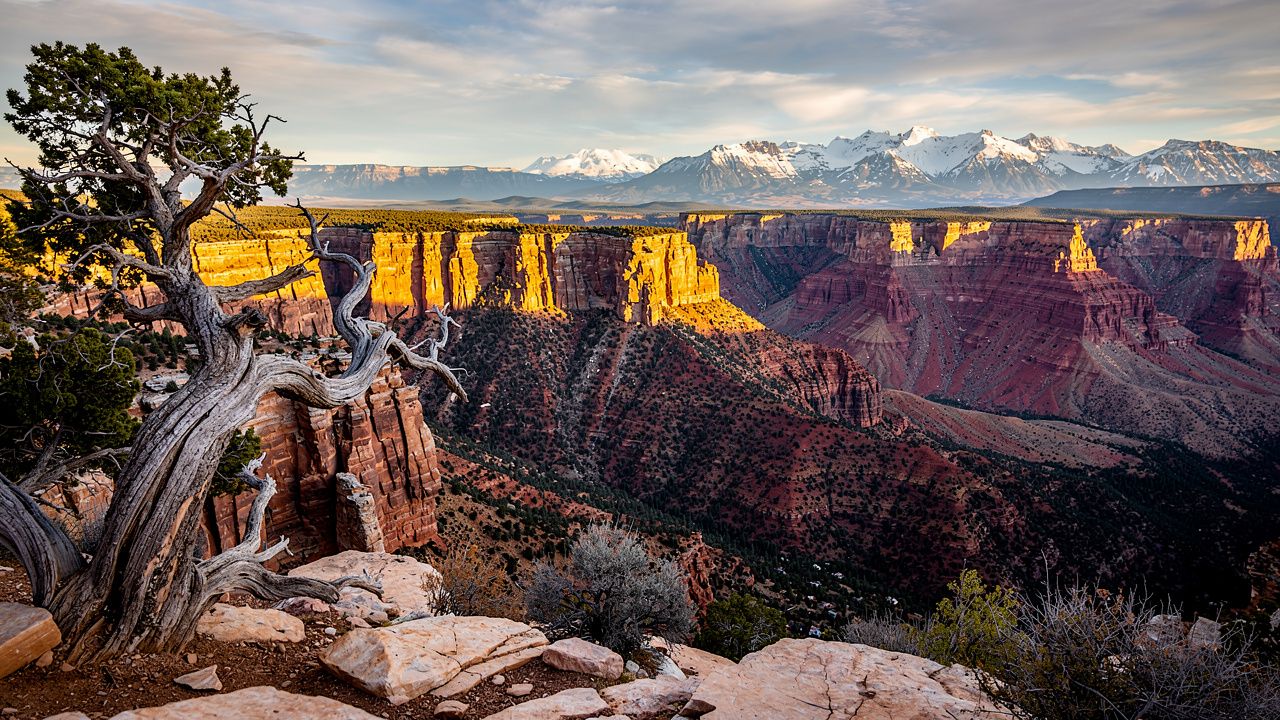
Panoramic view from Timber Creek Overlook

At the end of the road, the Timber Creek Overlook Trail begins from a small parking area. This one-mile round trip path climbs gently along a ridge, with packed dirt and rock underfoot. It is rated moderate mostly for elevation and a few rocky steps rather than any technical obstacles.

As the trail gains height, views expand in every direction. Ahead lies Timber Creek and the outermost finger canyons; to the side, the Pine Valley Mountains rise in the distance, often with snow lingering on their peaks well into spring. On clear days, you can even spot parts of main Zion far to the south.

A few benches near the end make this an ideal picnic spot. From a photography perspective, twisted juniper and pinyon trees create strong foreground shapes against the open sky. Clouds often build over the plateau in the afternoon, adding drama to wide-angle shots. Even at busy times, the overlook rarely feels crowded compared to the main canyon.

Seasonal Considerations And Winter Access

Kolob Canyons sits higher than Zion’s main entrance, which means it sees more snow and colder temperatures in winter. The park service sometimes closes the scenic drive temporarily after storms while crews clear ice and debris. These closures can last hours or days, depending on conditions.

Before adding this section to a winter or early spring Zion National Park road trip, check the National Park Service site or call the visitor center for current status. When the road is open and snow lingers on shaded slopes, the contrast between white ridges and red rock looks stunning. For hikers and photographers comfortable in cold weather, that trade-off can be well worth the extra layers and careful driving.

Strategic Base Camps: Springdale Vs. Kanab [Where To Establish Your Home Base]

Choosing where to sleep may be the most important decision after timing and starting city. Springdale and Kanab both work as bases for a Zion-focused trip, but they support different styles of travel. The right choice depends on whether the plan centers on Zion alone or spreads across a wider Southern Utah road trip.

Springdale hugs the main Zion entrance, pressed right up against towering cliffs. It feels like an extension of the park, with restaurants, galleries, and shuttle stops all within easy walking distance. Kanab sits about an hour east, in a more open valley, with quick access to multiple directions: Bryce, Lake Powell, Grand Staircase-Escalante, and even the North Rim of the Grand Canyon in season.

For travelers using Discover It Yourself, both towns pair well with a self-guided 4×4 trip, just in different ways:

  • Springdale works as a “park hub” with quick shuttle access and relaxed evenings after days in the main canyon.
  • Kanab works as a “regional hub” with a wider radius to slot canyons, backcountry roads, Bryce Canyon, and Lake Powell.

Springdale: Front-Door Access To Zion’s Main Entrance

Springdale’s main advantage is simple: it is right there. Many hotels and inns sit close enough that guests can walk or take a short shuttle ride to the Zion gate. The town itself runs a free shuttle along the main street, connecting lodging, shops, and the park entrance, which removes almost all parking stress.

The town has a well-developed visitor scene. That means plenty of places to eat, from coffee shops to sit-down dinners, as well as gear outfitters ready to rent water shoes, trekking poles, and dry bags. Art galleries and rock shops line the main drag, and patios fill with hikers comparing notes as the cliffs above town catch the last light of the day.

Hoodoos General Store has earned a loyal following for ice cream and souvenirs, making it a fun stop after a long hike. Lodging runs from basic motels to higher-end resorts with pools and views. Prices reflect that prime position at the gate, especially in peak months, and the town can feel busy. For travelers who want several days in a row focused on the main canyon, though, Springdale still offers the most convenient home base.

Kanab: Central Hub For Southwest Multi-Park Adventures

Kanab sits at the center of a broad map of Southwest highlights. From town, it is roughly an hour to the east entrance of Zion, about an hour and a half to Bryce Canyon, and about an hour to Page and Lake Powell. Grand Staircase-Escalante National Monument extends just beyond the edge of town, and the road toward the North Rim of the Grand Canyon begins nearby when that area is in season.

The town carries the nickname Little Hollywood thanks to its history as a filming location for Western movies, and it still feels more like a real community than a resort strip. The main streets hold local cafes, small shops, and a relaxed vibe that fits longer stays. Even at busy times, it rarely feels as packed as Springdale.

Lodging in Kanab covers standard hotels but also some standout stays:

  • BaseCamp 37° offers off-grid glamping tents that face the Chocolate Cliffs of Grand Staircase-Escalante, making sunrise and night-sky viewing unforgettable.
  • Timber & Tin provides modern small homes in downtown Kanab, with kitchens and living areas that work well for creative professionals who need space to edit, write, or plan.

Prices often come in lower than Springdale for similar or better quality, especially outside the highest-demand weeks.

Kanab also pairs naturally with Discover It Yourself’s philosophy. A premium 4×4 based here can reach remote trailheads, sandy backroads, and quiet overlooks in almost every direction. With coordinates and keys in hand, a traveler can spend one day at Zion, the next in a slot canyon, and the next at Bryce or Lake Powell, all without changing hotels.

Slot Canyon Adventures Around Kanab [World-Class Canyoneering Hub]

South of Zion, near the Utah–Arizona border, the stone splits into some of the best slot canyons on earth. Narrows, twists, and sculpted walls spread across a wide area, making Kanab a natural base for anyone serious about canyoneering or photography in narrow canyons.

Not all slots are equal, though. Some are mellow walks on sand with no ropes or special skills needed. Others demand technical gear, experience, and thoughtful planning. The common thread is respect for the terrain and the weather, since even a distant thunderstorm can turn a dry slot into a dangerous flood channel.

Discover It Yourself’s premium 4×4 vehicles shine in this region, since many trailheads sit at the end of sandy or rocky roads that standard rentals should not attempt. In some areas, the right move is still to go with a professional guide, especially in technical or tribal lands. The mix of self-guided days and guided adventures can make this part of the trip feel rich and varied.

“May your trails be crooked, winding, lonesome, dangerous, leading to the most amazing view.”
— Edward Abbey

Peekaboo Canyon: Family-Friendly Slot Canyon Introduction

Peekaboo Canyon, sometimes called Red Canyon, lies a short drive from Kanab but feels far more remote. Access roads cross soft sand and uneven ground, which is where high-clearance 4x4s prove their worth. Many visitors choose to join a guided 4×4 tour from town, turning the ride itself into part of the fun.

Once inside the canyon, the tone shifts from roar of engines to quiet footsteps. Walls narrow, light filters down in soft beams, and the sandstone curves into smooth, wave-like shapes. The walk through Peekaboo is short and mostly flat, making it a good fit for families or anyone new to slot canyons.

Photographers love this canyon for its rich reds and soft reflected glow. There is no need for ropes or special gear beyond normal hiking shoes and maybe a small tripod. Guides from Kanab add stories about geology and local history, as well as practical knowledge about weather and safe timing.

Wire Pass And Buckskin Gulch [Gateway To One Of The Longest Slot Canyons]

Buckskin Gulch holds a special place in the slot canyon world. With around 13 miles of tight narrows in its main stretch, it is often described as one of the longest and deepest slot canyons anywhere. The most common way to reach it is through Wire Pass, a shorter side canyon with its own charm.

From the Wire Pass trailhead, a mostly flat desert path leads 1.7 miles to the mouth of the slot. Soon the walls close in, and the route becomes a winding inner corridor of stone. After more twists, the canyon joins Buckskin Gulch, where hikers can continue downstream for a taste of the bigger system before turning back.

For many visitors, a 6–10 mile round trip day hike from Wire Pass into Buckskin and back offers plenty of immersion without the commitment of a through-trip. The full multi-day passage of Buckskin Gulch demands permits, careful planning around water levels, and experience dealing with obstacles and mud. Access to the Wire Pass trailhead requires a drive down House Rock Valley Road, which can be rough or impassable after rain. A high-clearance 4×4 and dry-weather timing make this road feel much safer.

Flash flood risk in Buckskin’s drainage is serious. Hikers should never enter if there is any chance of storms in a wide radius. Spring and fall typically bring more stable conditions, but checking forecasts and local updates the day before is always wise.

When To Hire A Local Canyon Guide

Self-guided exploration fits many parts of a Zion road trip, but slot canyons are where local guides often become essential. Any canyon that involves rappels, deep pools that require swims, or long, committing narrows with few escape options should be considered technical terrain. For these routes, a guide supplies gear, route knowledge, and decision-making under pressure.

Some areas also require guides by law. Famous examples include Upper and Lower Antelope Canyon near Page, which sit on Navajo Nation land and can only be visited on official tours. In such places, local guides not only keep visitors safe but also share cultural and historical context that visitors would never pick up on their own.

In the Kanab area, established guiding companies maintain permits for sensitive sites, track weather patterns in detail, and know alternate plans if a chosen canyon is unsafe that day. For simple, non-technical slots with clear paths and shallow sections, experienced hikers can go on their own with the right research and gear. Discover It Yourself often blends the two approaches: providing vehicle and coordinates for self-directed days, while recommending trusted guides when a canyon crosses into technical ground.

Extending Your Trip: Bryce Canyon Via Scenic Byway 12 [From Zion To The Hoodoos]

Once Zion has worked its way into memory cards and muscles, many travelers are not ready to turn back toward the airport. Extending the route to Bryce Canyon adds a new chapter that looks and feels very different yet fits perfectly into a larger Utah road trip itinerary. The drive between the two parks, especially along parts of Scenic Byway 12, is considered one of the best scenic drives near Zion.

Leaving either Springdale or Kanab, the road climbs to higher plateaus. Temperatures drop, forests appear, and then the earth opens into the famous hoodoo amphitheaters of Bryce. This section also links neatly into longer Utah Mighty 5 road trip plans, since Capitol Reef, Arches, and Canyonlands align farther east.

For creative professionals, this Zion to Bryce Canyon drive brings a fresh color palette and new visual shapes. Where Zion feels like giant walls and narrow corridors, Bryce looks like thousands of stone figures watching from a vast bowl. The contrast keeps the camera, and the mind, engaged.

The Red Canyon Preview [Bryce’s Beautiful Prelude]

Before reaching the main entrance road for Bryce Canyon National Park, Highway 12 passes through Red Canyon, part of Dixie National Forest. Here, the highway cuts between vivid red rock spires and arches, with tall pines rising from the slopes. Several tunnels on the road frame the views in a way that almost feels like moving through a series of film scenes.

Pullouts along this stretch invite quick stops, and they are worth taking. Trails start right near the road, offering short walks to closer views of hoodoos and windows in the rock. The Red Canyon Visitor Center provides maps and basic exhibits that explain how frost and water shaped the formations.

Because Red Canyon is less famous than Bryce, it often feels calmer despite its striking scenery. Early or late in the day, the low sun makes the red stone glow, and long shadows add depth. For anyone photographing the region, this is not just a quick drive-through; it is a small, rewarding session in its own right.

Bryce Canyon National Park: Hoodoo Amphitheaters
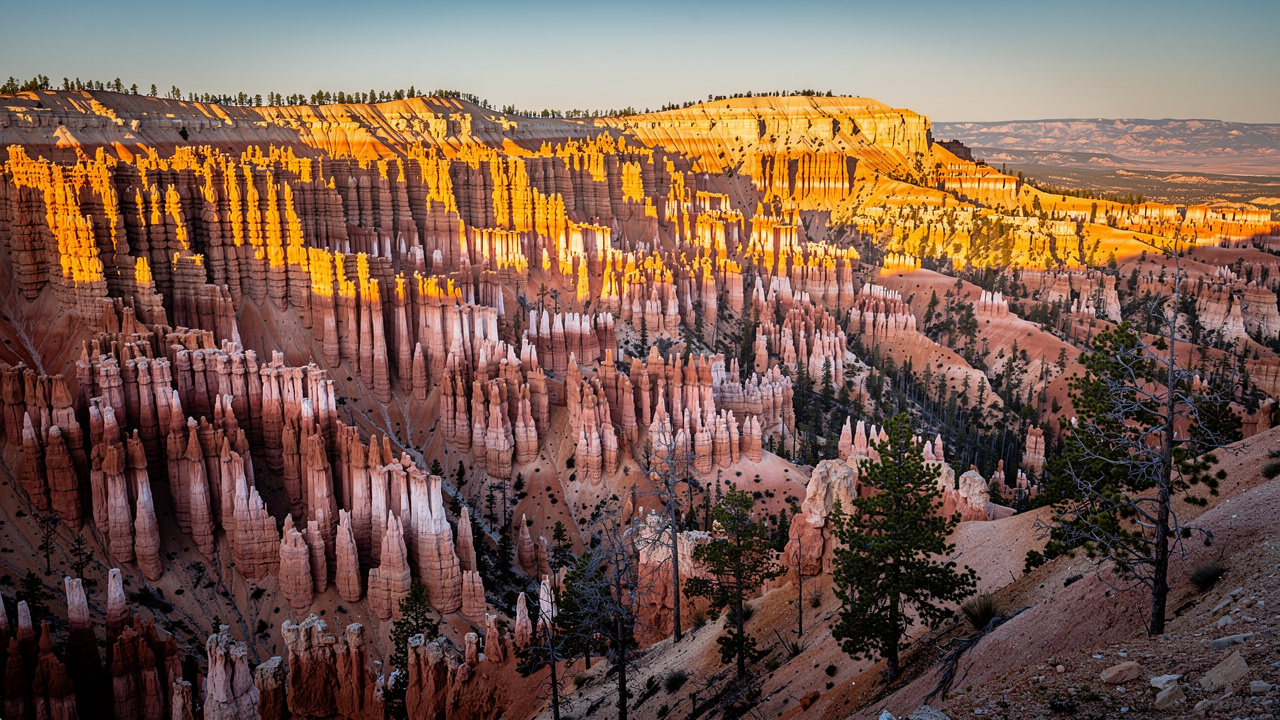
Bryce Canyon hoodoos at sunrise viewpoint

Many people arrive at Bryce expecting a single canyon, only to discover that the main feature is a chain of giant natural amphitheaters carved into the edge of the Paunsaugunt Plateau. The rim road runs along this edge for about 18 miles, with signed viewpoints that look into different sections of the hoodoo-filled basins below.

Hoodoos themselves are spires and towers of stone shaped by cycles of freezing and thawing. Water seeps into cracks, freezes, and expands, slowly breaking rock apart into narrow fins and then into columns. Colors range from pale cream to bright orange and pink, creating a layered effect that shifts with the light.

Key viewpoints include Sunrise Point, Sunset Point, Inspiration Point, and Bryce Point. One efficient strategy is to drive all the way to the far end of the road early, when parking is easy, then work back toward the entrance, stopping at overlooks on the return. Altitude here sits between 8,000 and 9,000 feet, so even modest walks can feel harder than expected, especially for visitors who just came from low desert. Pacing hikes and drinking plenty of water helps a lot.

Navajo Loop Trail: Descending Into The Hoodoos

While rim viewpoints give the classic postcards, the Navajo Loop Trail provides the full-body experience of walking among the hoodoos. Starting at Sunset Point, the path drops quickly down compact dirt and switchbacks into the main amphitheater. In a short distance, you go from looking down on formations to standing at their base.

One branch of the loop passes through the famous Wall Street section, a narrow slot between tall rock walls lined with towering pine trees that somehow found just enough soil and light to grow. The other branch, through Two Bridges, winds between differently shaped fins and columns. Either way, the full loop measures about 1.3 miles with roughly 550 feet of elevation change.

The climb back to the rim is steady and can feel steep, especially at this altitude, but there are many spots to pause and catch your breath. The experience of looking up at formations you just viewed from above brings a powerful sense of scale. Linking part of Navajo Loop with the Queen’s Garden Trail creates a slightly longer figure-eight that many visitors rank as their favorite Bryce hike.

Conclusion

An iconic road trip with Zion at its center is more than a checklist of parks. It is a string of early alarms for sunrise light, long drives that quiet the mind, and trails that make muscles pleasantly tired by nightfall. From the first glimpse of crimson cliffs near Springdale to the last hoodoos fading in the rearview mirror near Bryce, the route offers both grand views and small, private moments.

Planning with intention turns this from a rushed circuit into a rich, flexible experience. Choosing the right season avoids the worst of the heat and crowds. Picking between Springdale and Kanab, or using both, shapes how wide the route can spread. Understanding Zion’s shuttle system, the layout of Route 9, and the options in East Zion and Kolob Canyons means each day can be focused instead of frantic.

Tools matter too. A premium 4×4 from Discover It Yourself is not just about comfort; it is about access. It opens rougher side roads to slot canyons, quiet overlooks, and lesser-known state parks without stress about getting stuck or damaging a low-slung rental. Combined with coordinates and a self-guided approach, that vehicle turns a standard Utah road trip into a personal project of discovery.

For creative professionals, this region doubles as a studio and a reset. It offers images, stories, and memories that keep feeding work long after the last mile. With the guidance in this article, plus your own curiosity and timing, Zion National Park and its neighbors are ready for you to discover them yourself.

FAQs

How Many Days Do I Need For A Zion-Focused Road Trip?

A solid Zion National Park road trip can fit into three full days if time is tight. That usually allows one day for the main canyon shuttle stops and a couple of classic hikes, one day for East Zion and the Zion-Mount Carmel Highway, and one day for either Kolob Canyons or nearby state parks. For travelers who want to add Kanab slot canyons and a Zion to Bryce Canyon drive, five to seven days feels much more relaxed.

Do I Really Need A 4×4 For This Route?

You can visit Zion’s main canyon and Bryce Canyon in a standard sedan if you stay on paved roads and avoid rough access tracks. However, a premium 4×4 from Discover It Yourself opens far more options, especially around Kanab, Lake Powell, and some East Zion pullouts. High clearance and strong tires reduce stress on dirt and sand, which means more chances to explore remote viewpoints and quiet areas away from crowds.

Is It Safe To Drive And Hike In Summer Heat?

Summer in Southern Utah can be very hot, but with smart habits it remains manageable. Plan strenuous hikes before 10:00 AM or after 4:00 PM, rest in shade during the hottest hours, and drink water throughout the day, not just during hikes. Sun protection, light clothing, and listening to early signs of fatigue all matter. Water-based hikes like The Narrows and time at reservoirs such as Quail Creek help balance the heat with cooler experiences.

Can I Visit Both Zion And Bryce Canyon In One Day?

It is possible to drive from Zion to Bryce, visit viewpoints, and return in one long day, but it often feels rushed. The drive itself can take around two hours each way, depending on your starting point. That leaves limited time for hikes or unrushed photography. For creative professionals or anyone who values space to explore, staying one night near Bryce or in a central hub like Kanab makes the Zion to Bryce Canyon drive far more rewarding.

How Far In Advance Should I Book Lodging And Permits?

Spring and fall dates, especially weekends, tend to fill early for both lodging and popular hikes. Reserving hotels in Springdale or Kanab several months ahead is wise if your dates are fixed. Permits for Angels Landing and high-demand slot canyon tours can also sell out quickly, so secure them as soon as your trip dates are set. For Discover It Yourself 4×4 rentals, early booking helps match you with the best vehicle for your route and timing.
There is a moment on every Grand Canyon road trip when the world goes quiet, touching something deeper than simple sightseeing—it connects to fundamental attitudes toward wilderness and how natural spaces reshape our perspective. The highway straightens, the pines part, and that first impossible chasm opens in front of the hood. For a second, the map in your head fails. The canyon is deeper, wider, and more alive than any photo suggested, and the long miles to get here suddenly feel more than worth it. For many travelers, Iconic Road Trips Grand Canyon is not just a phrase; it is the experience that resets what the word “scale” even means.

A Grand Canyon drive is not just about checking off a national park. It is miles of empty desert two-lane, cold air at 8,000 feet on the North Rim, hot sun on red rock in Sedona, and that late-night cruise back to a lodge with stars so bright they look fake. It is the satisfaction of arriving under your own power, choosing when to stop, and deciding how far off the main route to go for that perfect overlook.

That is where self-guided exploration comes in. Instead of climbing on a crowded bus and following a flag, you control the schedule, the playlist, and the level of adventure. With a premium 4×4 from Discover It Yourself out of Las Vegas, GPS coordinates instead of a guide, and quiet waypoints that most tourists never see, the entire Southwest turns into your own driving playground.

“In the Grand Canyon, Arizona has a natural wonder which, so far as I know, is in kind absolutely unparalleled throughout the rest of the world.” — Theodore Roosevelt

By the end of this guide, you will know how to pick the best gateway city, design a Grand Canyon road trip itinerary that matches your time and comfort level, choose between South, North, and West Rims, and plug in side trips to Sedona, Page, and Zion. Along the way, you will pick up insider tips on timing, trail choices, and underrated stops that give you privacy even in famous places. In short, you will have everything needed to design a Grand Canyon national park road trip that feels like it was built just for you.

Key Takeaways

Before diving into the details, it helps to see the big picture of what this guide delivers. Think of this section as your quick reference for planning an iconic Grand Canyon drive without scrolling back and forth later.

  • This article compares the main gateway cities for a Grand Canyon road trip and explains who each one fits best, from Phoenix and Las Vegas to longer starting points like Salt Lake City and Denver. By matching your starting hub to your time frame and style, you avoid wasted driving and get more real time at overlooks and trailheads. You also see how a Las Vegas start with Discover It Yourself opens up flexible loop options that standard rentals and tour buses cannot match.
  • Timing matters as much as location, and you will see clear guidance on when each rim works best across the year. The South Rim is open year-round but packed in summer, the North Rim is seasonal and perfect for quiet fall trips, and Grand Canyon West shines for fast visits from Las Vegas. Knowing this lets you line up your vacation window with the right rim rather than fighting crowds or closed roads.
  • The three main rims offer very different experiences, and this guide spells out what you gain at each one. The South Rim brings classic views and services, the North Rim brings calm and forest, and the West Rim adds tribal perspectives and the Skywalk. With that comparison in mind, you can decide whether you want all three, just one, or a balanced mix.
  • Several scenic drives turn simple transit into highlights of the trip, and you will see how to work them into your plan. Desert View Drive, Historic Route 66 through Oatman and Kingman, and the inter-rim route past the Vermillion Cliffs all stand out as must-drive segments, especially for anyone who loves the feeling of a Grand Canyon scenic drive through wide-open country.
  • Signature hikes and activities at different fitness levels are laid out, from South Kaibab day hikes and Hermit Road biking to mule rides and Angel’s Landing in Zion. This makes it easier to match each day to your group’s energy instead of guessing from a map once you arrive.
  • The guide highlights nearby stars like Sedona, Page with Horseshoe Bend and Antelope Canyon, and Zion National Park, then shows how they fit naturally into an Arizona road trip or larger “Grand Circle” loop. That means less research time and fewer missed chances to see world-class scenery only a few hours from the canyon.
  • Premium 4×4 access is a game-changer for those who want real solitude, and you will see exactly where that matters most. With Discover It Yourself, you can reach lesser-known viewpoints, rougher side roads, and desert pullouts that standard sedans and tour buses skip, giving you space for proposals, photo shoots, or just a quiet sunset away from the railings.
  • Throughout the article, the focus stays on self-guided travel instead of packaged tours, so you keep full control of your schedule. By the end, you will have enough detail to plan a safe, ambitious, and very personal Grand Canyon road trip without feeling locked into anyone else’s script.

Strategic Planning: Choosing Your Gateway And Crafting Your Route

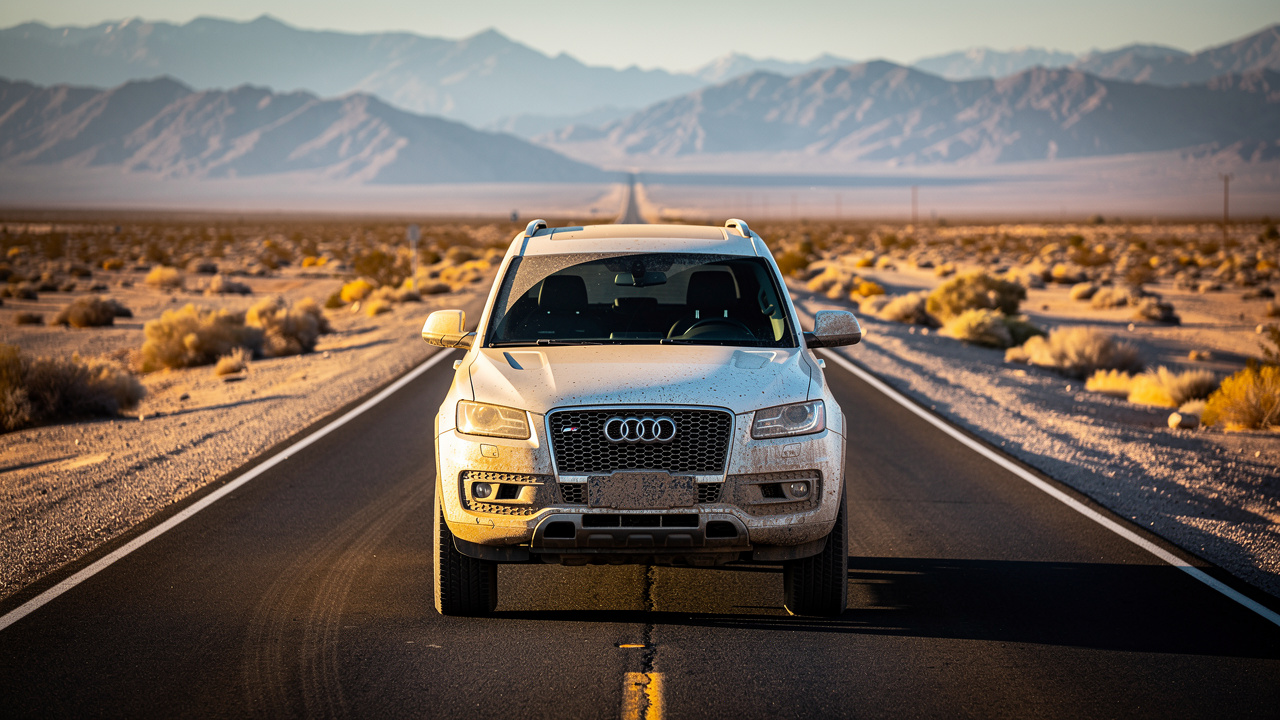
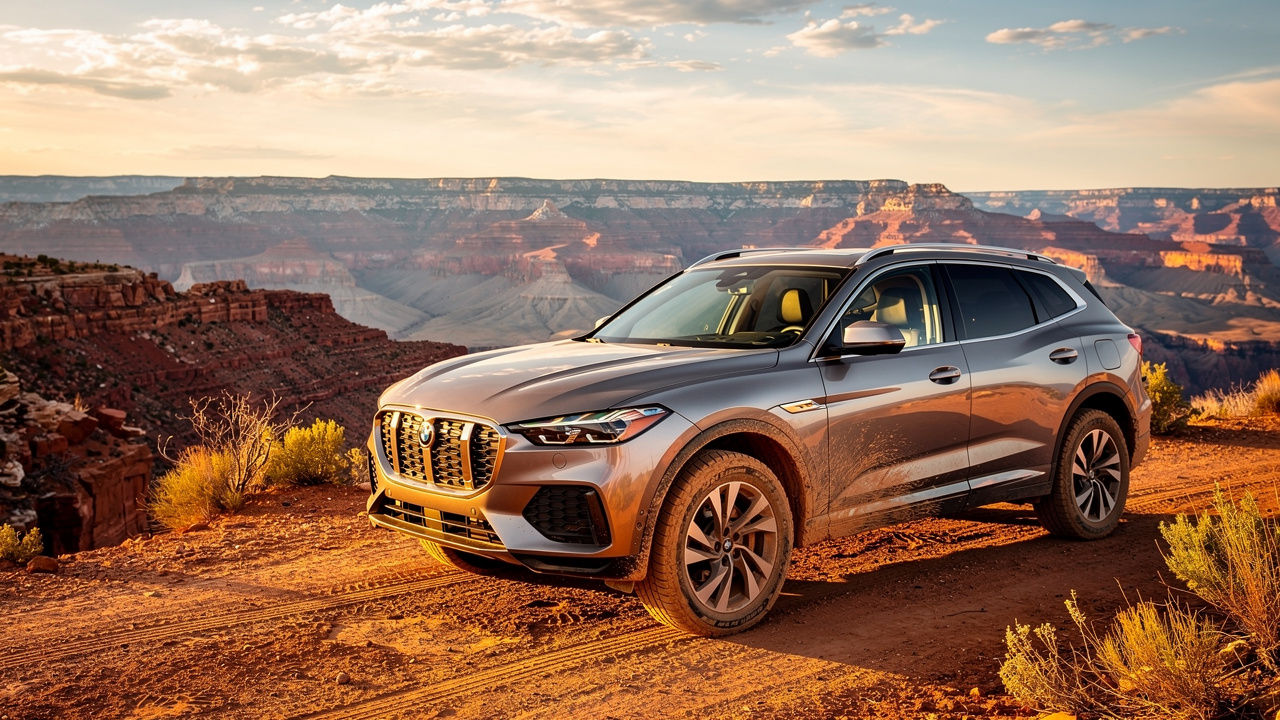
Premium 4x4 SUV at remote Grand Canyon overlook

Every great Grand Canyon road trip starts long before the first canyon overlook. The city you fly into, the route you choose, and the kind of vehicle you drive all shape what you see, how rushed you feel, and how often you get away from crowds. Planning here is less about strict schedules and more about setting up a flexible framework that matches your style.

Most travelers start a Grand Canyon road trip from Phoenix or Las Vegas, but Salt Lake City, Denver, and New Mexico hubs can turn the canyon into the centerpiece of a long Southwest loop, and understanding tourism and environment relationships helps optimize route planning to minimize impact while maximizing experience. Each starting point has a different flavor, from cactus-filled desert drives to alpine passes and red rock corridors. For industry professionals planning travel for clients or teams, understanding these flavors is the key to building trips that people still talk about years later.

The other big decision is how independent you want to be. Standard rentals can handle main highways, but many of the most memorable overlooks and quiet pullouts sit at the end of dirt or washboard sections. This is where a premium 4×4 from Discover It Yourself, starting in Las Vegas with coordinates instead of guides, opens up routes and stops that would not be smart in a small sedan.

When sketching your plan, it helps to ask:

  • How many days can you realistically spend on the road?
  • Which rim or rims are non-negotiable for this trip?
  • Do you prefer one central base or several shorter overnight stops?

Answering those questions first makes every later decision—routes, hotels, and activities—much easier.

Phoenix And Southern Arizona: The Classic Ascent

A Phoenix start delivers the classic “Arizona road trip” feel. The first miles out of the city pass through the Sonoran Desert, with saguaro cactus standing like giant sentries beside the highway. As the road climbs toward the Colorado Plateau, those cacti fade into high-country pines, cool air, and occasional snow in winter, so the drive itself feels like a slow-motion elevator from desert floor to mountain rim.

On this route, Sedona and Flagstaff become natural waypoints rather than side trips. Sedona’s red cliffs and short hikes break up the drive with color and motion, while Flagstaff functions as a high-altitude base with real services, breweries, and lodging. Many travelers spend a night or two in Flagstaff to adjust to the elevation, fit in a Sedona day trip, and then strike out early for the South Rim before day-use crowds arrive.

Phoenix works best for first-timers focused on the South Rim who want a clean, all-Arizona loop. Wine-country stops in places like Cottonwood, historical ruins, and short detours along Highway 89A give the route more texture without requiring extra state lines. If you start with a Discover It Yourself 4×4 in Las Vegas, you can still connect into this classic ascent using a western loop that drops into Arizona, picks up 89A near Sedona, then climbs toward the canyon. That combination gives you the character of a Phoenix route with better access to side roads and quiet spots a standard rental might skip.

Las Vegas: The Western Approach And Grand Circle Gateway

Las Vegas is far more than a place to land and leave. For Grand Canyon trips that also include Zion, Bryce Canyon, or other national parks, it is the most efficient and flexible jump-off point. From the Strip, you can angle southeast toward Hoover Dam and Grand Canyon West, northeast to Valley of Fire and Zion, or thread a big loop that touches three rims before curving back to Nevada.

The stretch between Las Vegas and the canyon passes through the Mojave Desert, with long open views and minimal development, which is exactly where a capable 4×4 shines. With Discover It Yourself, the desert outside Las Vegas turns into a playground of quiet overlook coordinates, little-used dirt pullouts, and photo stops that you would never find by following a tour bus. You can hit Hoover Dam for its concrete-and-steel drama, then be standing alone on a rock outcrop for sunset only an hour or two later.

This western approach is ideal for travelers who want to combine the Grand Canyon West Rim, the North Rim, and the South Rim into one grand-circle style loop. One common pattern is:

  • Las Vegas
  • Grand Canyon West and the Skywalk
  • North Rim
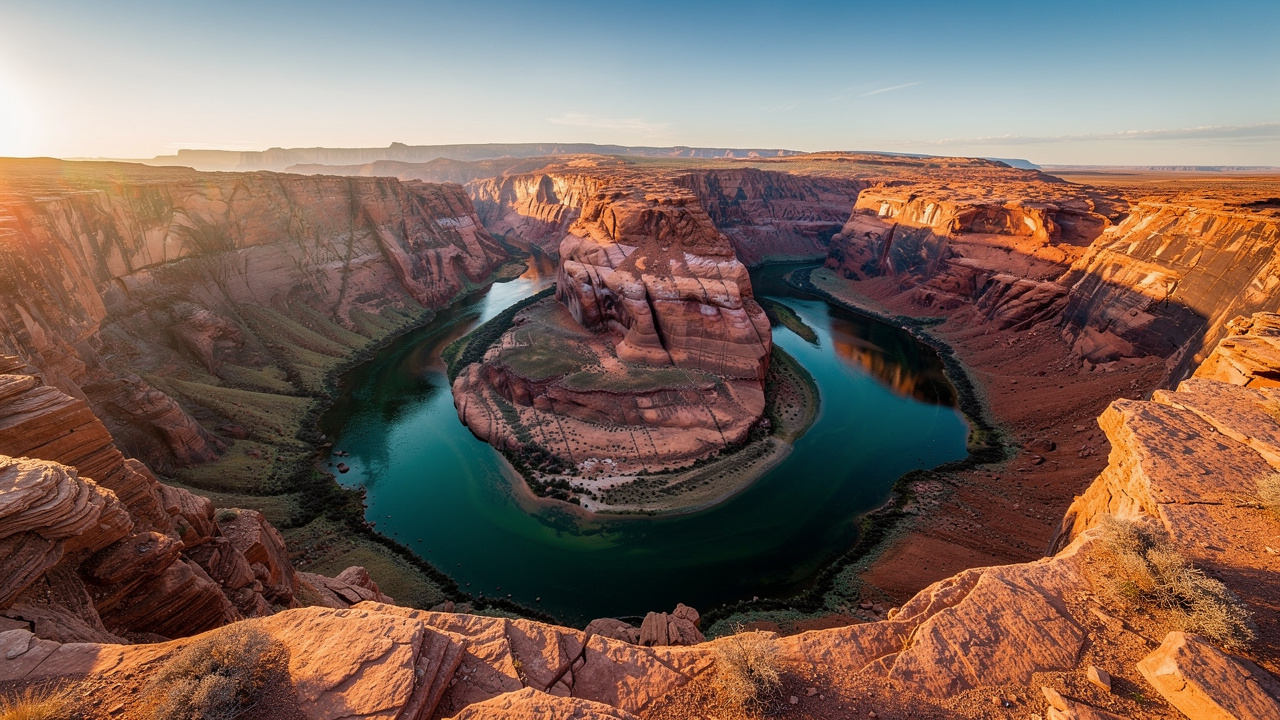
  • Page (Horseshoe Bend and Antelope Canyon)
  • South Rim
  • Back through Williams or Route 66 to Las Vegas

That pattern keeps driving segments manageable while still fitting in major parks, and it lets you drop the vehicle back in the same city where you landed, which is helpful for both independent travelers and corporate groups.

Extended Routes: Salt Lake City, Denver, And Beyond

When time is generous and the road is the main event, starting far from the canyon can make a lot of sense. Salt Lake City is the logical gateway for a Utah-heavy loop that includes Zion, Bryce Canyon, Capitol Reef, Arches, and Canyonlands, often called the Mighty 5. In that style of trip, a Grand Canyon North Rim road trip becomes the southern highlight of a longer Utah-focused circuit, adding dramatic depth without much extra mileage.

Denver, on the other hand, turns a Grand Canyon national park road trip into a cross-state experience that passes ski towns, high passes, and the high desert of western Colorado. From there, you can drop into the Four Corners region, weave through Monument Valley, then swing west toward Page and down to the South Rim. For extended families, photography groups, or digital nomads who can work on the road, this pattern allows for slow travel, rest days, and deeper time in side areas rather than rushing from viewpoint to viewpoint.

New Mexico hubs such as Albuquerque and Santa Fe add another layer, mixing pueblos, art districts, and desert drives before the route shifts west toward the canyon. Longer routes like these make high vehicle reliability and capability non-negotiable, since a breakdown on a remote two-lane road can cost a full day. This is where a modern 4×4, smart mapping, and self-guided coordination points matter. Even when you move between highways and remote scenic byways, you can keep your own pace, meet friends or colleagues at agreed stops, and treat the Grand Canyon as one powerful chapter in a much larger road trip story.

Route 66 And Grand Canyon West: Icons Of The American Road Trip

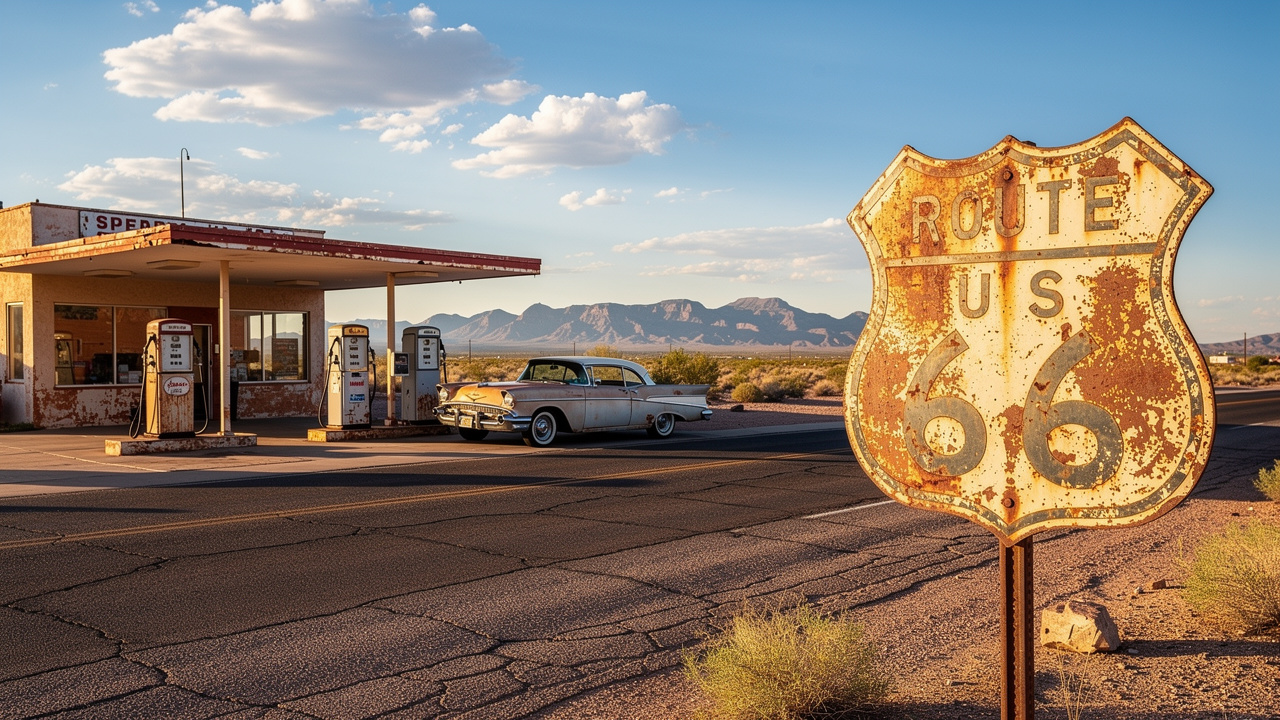
Historic Route 66 roadside scene in Arizona desert

For many travelers, a Grand Canyon road trip is as much about the drive as the views from the rim. Nowhere is that more true than along Historic Route 66 and the western approach to Grand Canyon West. Here, mid-century neon signs, roadside diners, and Wild West mining towns share the stage with tribal lands and glass bridges suspended over a 4,000-foot drop.

This region adds depth to any Grand Canyon road trip itinerary. Instead of hopping straight from freeway to park gate, you thread through towns that still wear their Route 66 roots with pride, then shift onto Hualapai land for a very different relationship with the canyon. For travelers starting in Las Vegas with Discover It Yourself, this segment makes an ideal first or last leg, turning what could have been a simple transfer day into something guests will talk about long after the trip.

“If you ever plan to motor west, travel my way, take the highway that’s the best: Get your kicks on Route 66.” — Bobby Troup

The Mother Road: Navigating Historic Route 66

Driving the Arizona stretch of Route 66 feels like stepping back into an era of chrome bumpers and hand-painted billboards. The modern interstate peels away, the road narrows to two lanes, and the scenery opens into rolling hills and distant ridges. Faded gas stations and classic motels still line the main drag in places, giving your drive more character than any rest-stop exit ever could.

Oatman is often the first real surprise on this route. Once a mining town, it now feels like a living movie set, with wooden boardwalks and wild burros wandering between parked cars. These donkeys descend from animals once used underground, and they now stroll the streets like they own them. Staged gunfight shows, quirky shops, and the old Oatman Hotel with its stories of Hollywood stars make it easy to spend more time here than planned, especially for photographers.

Getting to and from Oatman usually means driving Sitgreaves Pass, which might be one of the most memorable stretches of pavement on the whole trip. The road winds up through tight curves with steep drop-offs and sweeping views, so a calm, focused driving style is important. A capable vehicle handles the grades and tight turns with more confidence, which is another reason 4x4s are so popular for this section. Kingman then serves as the “Heart of Route 66,” with its museum, retro diners, and plenty of places to gas up, stock snacks, and shoot photos of old signage. Early-morning or late-afternoon drives bring out the best light for photos and cut down on summer heat in this exposed region.

Grand Canyon West And The Skywalk Experience

Grand Canyon West sits on Hualapai Tribal land, which means it runs on entirely different rules than Grand Canyon National Park. There are separate entrance fees, different passes, and a distinct feel once you arrive. Instead of a town-like village and paved roads along the rim, you find a compact set of viewpoints, shuttle stops, and experience-based attractions built around the canyon’s edge.

The star here is the Skywalk, a horseshoe-shaped glass bridge that curves out beyond the rim itself. Walking across the clear floor with nothing but glass between you and the canyon floor thousands of feet below is a real mental test, even for those who thought they had no problem with heights. The sensation of looking straight down while your feet are technically on solid tempered glass is something standard overlooks can never quite match. Because of safety and flow, personal cameras are not allowed on the Skywalk, and official photographers handle photos for anyone who wants a record of the moment.

A hop-on, hop-off shuttle links Eagle Point, Guano Point, and Hualapai Ranch:

  • Eagle Point includes the Skywalk and a Native American Village area where examples of traditional dwellings from several tribes stand side by side.
  • Guano Point offers some of the widest views, with a hill you can climb for full 360-degree panoramas of the river and canyon.
  • Hualapai Ranch adds a Western-themed area with simple cabins and cowboy-style entertainment.

Visits here work best for Las Vegas day-trippers, tight schedules, or anyone who wants the thrill of the Skywalk and strong tribal presence more than the classic national park feel. Arrive right at opening or toward closing to reduce crowds, then continue on toward the North Rim or back to Las Vegas as part of a wider loop.

The Grand Canyon South Rim: Iconic Vistas And Classic Adventures

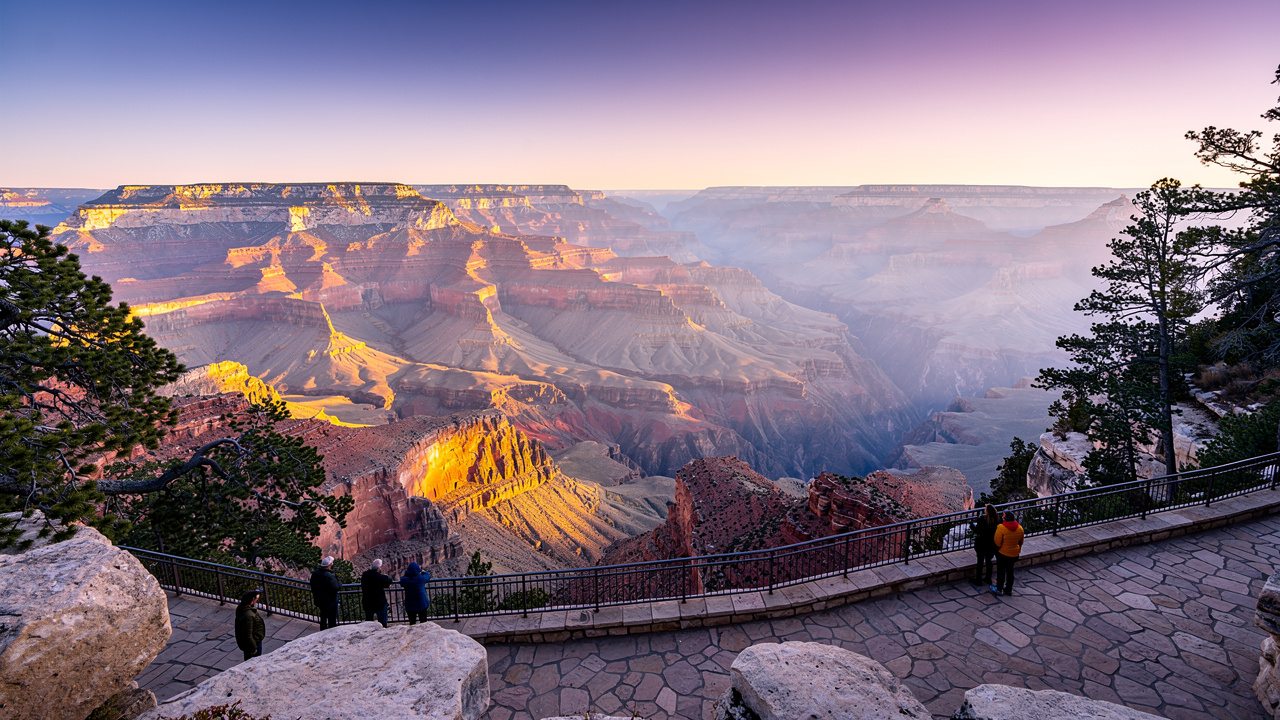
Mather Point sunrise view at Grand Canyon South Rim

The South Rim is what most people picture when they think of a Grand Canyon road trip. It has the famous viewpoints, wide stone railings, and classic lodges perched on the edge. It also has restaurants, visitor centers, shuttle buses, and a level of access that makes it work for families, first-timers, and serious hikers at the same time.

Because it is open year-round and easier to reach than the North Rim, the South Rim can feel very busy, especially in summer and on holiday weekends. The good news is that with smart timing, a bit of walking, and a willingness to explore beyond the main parking areas, you can still find quiet stretches of rim and personal moments with the canyon. Self-guided travel lines up well here, because you control sunrise alarms, trail choices, and how much time you spend at each overlook.

Grand Canyon Village And Essential Viewpoints

Grand Canyon Village is the historic heart of the South Rim and the main hub for many visitors. Here you will find the main visitor center, bookstores, trailheads, restaurants, and several lodges, including the famous El Tovar Hotel and Bright Angel Lodge. The railroad depot where the Grand Canyon Railway arrives adds a sense of history every time a train pulls in, and the area bustles most of the day.

Nearby sit some of the easiest and most dramatic viewpoints on the rim:

  • Mather Point – a popular first view with wide platforms and sweeping angles into the canyon
  • Yavapai Point – great views and an indoor geology museum, handy on windy or cold days
  • Hopi Point – a classic sunset location with long sightlines both east and west

During peak seasons, the free shuttle bus system is the best way to move between these spots without hunting for parking at every stop. Buses run on set routes and stop at major overlooks and trailheads, so you can park once and explore all day. For sunrise, it pays to arrive at Mather Point at least 45 minutes before the sun appears, especially in summer, to claim a quieter spot on the rail. Shoulder months like May, September, and October often bring pleasant temperatures and noticeably smaller crowds, which can be an advantage for groups and families.

Desert View Drive: A Scenic Route Along The South Rim

East of Grand Canyon Village, Desert View Drive runs for about 25 miles toward the park’s East Entrance. This stretch offers one of the best Grand Canyon scenic drives, with pullouts and viewpoints that feel more spaced out and relaxed than the busiest village overlooks. The canyon constantly shifts shape and color as you move along this road, so even repeat visitors find new angles here.

Key stops include Yaki Point near the South Kaibab Trailhead, Grandview Point, Moran Point, and Lipan Point. Grandview Point sits above a historic mining route and gives a sense of the canyon’s human history as well as its scale. Moran Point is well known for excellent views of the Colorado River far below, while Lipan Point opens to far-reaching vistas that seem to go on forever. Each stop has its own character, and spending a few unhurried minutes at each often beats racing through every overlook on the map.

The drive ends at Desert View, home to the Desert View Watchtower. This stone tower, designed by architect Mary Colter in the early 1930s, is both a viewpoint and an artwork, with murals inside and a spiral staircase leading to a lofty observation level. From the top, you can see the river, the canyon, and the Painted Desert stretching off toward the horizon. Many travelers allow three to four hours for the round-trip drive with photo stops and a climb up the tower. The Desert View area also has a quieter campground and a small trading post, and the road here connects naturally to the route toward Cameron Trading Post and the North Rim.

Hiking Into The Canyon: The South Kaibab Trail Experience

Standing at the rim is powerful, but stepping below it changes everything. The air warms, the walls rise around you, and the colors shift with every switchback. The South Kaibab Trail is many hikers’ first choice for a day hike into the canyon because it follows a ridge with nearly constant views instead of dropping into a side ravine.

Two common turnaround points work well for most visitors:

  • Ooh Aah Point – about 1.8 miles round-trip from the trailhead with a fast, dramatic payoff
  • Cedar Ridge – roughly 3 miles round-trip, with a broad, flat area, restrooms, and room to sit

Rangers strongly warn against trying to reach the Colorado River and climb back out in a single day, and that advice should be taken seriously.

This trail has no water sources and very little shade, so preparation matters. Keep these basics in mind:

  • Carry at least one liter of water per person per hour below the rim.
  • Pack salty snacks and strong sun protection (hat, sunscreen, sunglasses).
  • Start early, ideally before 8 a.m. in warmer months, to avoid heat and crowds.

Even a short descent rewards you with the quiet crunch of boots on the trail, the sound of distant ravens, and close-up looks at rock layers that you barely noticed from above.

Hermit Road And Rim Trail: Biking And Walking Adventures

West of Grand Canyon Village, Hermit Road runs about seven miles along the rim toward Hermits Rest. During the busy season, this road is closed to private cars, which makes it perfect for bikes and shuttle buses. Renting a bike in the village and pedaling this stretch gives you the freedom to stop wherever a viewpoint catches your eye.

Along the way, spots like Maricopa Point, The Abyss, and Pima Point stand out for different reasons. Some overlook sheer drops, others frame long sections of the river far below, and many offer excellent sunset views. The Rim Trail, a mostly paved path that parallels much of the rim for more than 13 miles, offers a walking alternative with sections that are nearly flat. Moving under your own power, without a car door between you and the views, creates a slower, more personal connection with the canyon that pairs well with the self-guided spirit of a Discover It Yourself-style trip.

The North Rim: Solitude, Serenity, And The Canyon’s Wild Side

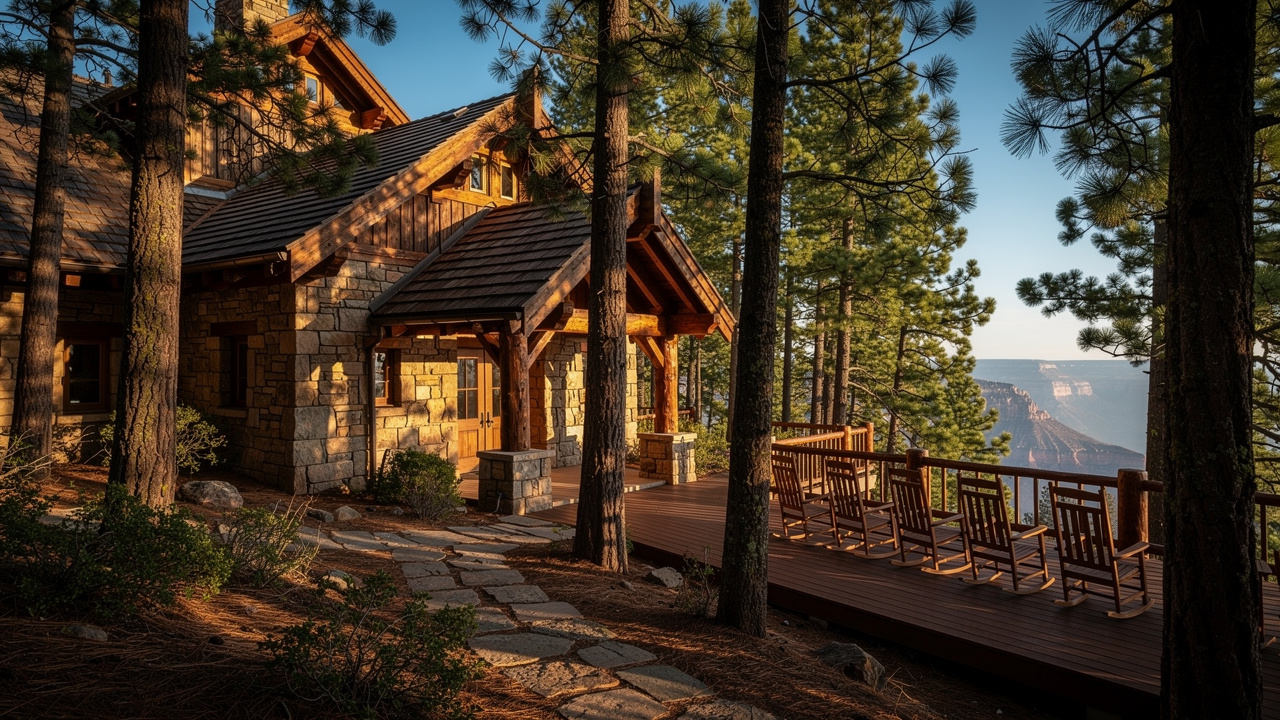
Historic Grand Canyon Lodge surrounded by pine forest

If the South Rim is the canyon’s busy front porch, the North Rim feels like a quiet back deck shared with only a few neighbors. It sits over 1,000 feet higher, is blanketed in thick forests of pine and aspen, and sees only a fraction of the visitors. Those who make the effort are rewarded with cooler air, softer light, and long stretches of silence broken only by wind and wildlife.

The North Rim is open only from mid-May to mid-October most years, depending on snow. Services are limited, lodging is scarce, and cell coverage is spotty to nonexistent. For many industry professionals designing higher-end or small-group trips, that is the main appeal. It feels remote and personal, and people tend to slow down here, sitting longer at overlooks and lingering over evening conversations. This mindset lines up well with the privacy and self-directed nature of Discover It Yourself travel.

“The wonders of the Grand Canyon cannot be adequately represented in symbols of speech, nor by speech itself.” — John Wesley Powell

The Drive To The North Rim: A Road Trip Within The Road Trip

Driving between the South Rim and North Rim is not a quick hop. Although the rims sit roughly ten miles apart as the crow flies, the road wraps around the canyon for about 215 miles. Rather than treating this as dead time, it is better to see it as one of the most rewarding driving days of the entire trip.

Leaving the South Rim through the East Entrance, you descend toward the Navajo Nation and soon reach Cameron Trading Post. This historic stop, founded in 1916, combines a large shop filled with Native American rugs, jewelry, and crafts with a restaurant known for Navajo-style fry bread tacos and hearty plates. It is a natural place to refuel both people and vehicles while learning about regional art and culture. Farther along, you cross the Colorado River at Marble Canyon on the twin Navajo Bridges, one for cars and one reserved for pedestrians. Parking and walking out over the old bridge puts you hundreds of feet above the river, a thrilling but safe way to appreciate its depth.

Beyond the river, the road follows the base of the Vermillion Cliffs, a massive wall of red rock that dominates the horizon. Here you find Cliff Dwellers, a tiny community with a restaurant that feels like a found treasure in the middle of nowhere. Many travelers remember this spot for its good food and surreal scenery as much as any overlook inside the park. The last major stop before the forest climb to the North Rim is Jacob Lake Inn, which doubles as a gas stop, lodge, gift shop, and bakery famous for its cookies and pies. With so much to see and do along the way, planning five to six hours for the drive, including photo stops and meals, keeps the day relaxed.

Grand Canyon Lodge And Bright Angel Point: The North Rim’s Heart

At the end of the forested road, the Grand Canyon Lodge appears almost out of nowhere, perched right on the rim. Built in the late 1920s, the lodge blends stone and timber in a way that makes it feel anchored to the canyon rather than placed on it. Inside, a Sun Room with huge windows and a wide outdoor veranda invite guests to sit with coffee, a drink, or just their thoughts while staring into the depths.

The dining room is the only full-service restaurant on the North Rim and comes with views straight out over the canyon. Meals here feel less rushed than many places on the South Rim, partly because guests know reservations were hard to get and want to savor the time. A short, paved path begins near the lodge and leads out to Bright Angel Point, a must-do walk that takes only about half a mile round-trip. The narrow spine at the end offers dramatic views into Bright Angel and Roaring Springs Canyons and a clear sense of how the plateau breaks apart into side canyons.

Lodging at the lodge and nearby cabins is limited and often booked more than a year in advance, so early planning matters. There is little to no cell service, and Wi-Fi is either weak or absent, which pushes people to disconnect in the best way. Evening ranger talks, clear dark skies, and the soft sound of wind in the trees combine to make this feel less like a standard hotel stay and more like time spent at a remote retreat.

North Rim Activities: Mule Rides, Hiking, And Wilderness Exploration

The North Rim is not just about sitting and staring, although that alone can fill hours. Several mule ride options let visitors experience the canyon from a different angle. Short rim rides pass through the forest and out to overlooks, while longer three-hour trips on the Uncle Jim Trail and partial descents on the North Kaibab Trail introduce steeper terrain and deeper views. Riding a sure-footed mule along narrow paths, with an experienced guide leading the way, gives many guests the confidence to see areas they would not hike on their own.

For hikers, the Transept Trail is a good starter option. This relatively easy path runs between the campground and the lodge along the edge of the Transept, a side canyon, offering steady views without harsh grades. Those wanting more of a workout can tackle the Widforss Trail, roughly ten miles round-trip through forest and out to a dramatic overlook, which often remains quieter than more famous routes. The North Kaibab Trail heads down into the canyon itself and forms part of the famed rim-to-rim route for backpackers, but even a short out-and-back section can provide a sense of the inner canyon’s mood.

Wildlife feels more present here than at the busier South Rim. Kaibab squirrels with their tufted ears, mule deer grazing in meadows, wild turkeys, and occasional sightings of California condors all add to the sense that you are sharing this place rather than just viewing it. Late June brings wildflowers in open areas, while September often lights up the aspen groves with yellow leaves, making those months especially rewarding for photographers and nature-focused travelers.

Gateway Towns And Memorable Accommodations: Where To Base Your Adventure

Where you sleep on a Grand Canyon road trip shapes the feel of each day. Gateway towns around the region do more than provide beds and gas. They add breweries, coffee shops, ghost stories, train whistles, and local characters to the mix. Choosing the right base for each leg of the trip helps balance long driving days with comfortable evenings and gives teams or families an easy way to split up and explore.

From a planning standpoint, it often makes sense to combine one or two nights inside or near the park with nights in nearby towns. That pattern allows you to cover must-see highlights at peak times and then retreat to quieter, more comfortable surroundings afterward. For guests using Discover It Yourself, these bases also double as launch points for more remote coordinates and side drives that a package tour would skip.

Flagstaff: The Mountain Town Hub

Flagstaff sits at about 7,000 feet above sea level, surrounded by one of the largest ponderosa pine forests on the planet. This setting gives it a cool, alpine feel in summer and a cozy, snow-dusted charm in winter, which is a welcome contrast after hot desert drives. Historic Route 66 passes right through town, and the compact downtown is very walkable, which makes it easy to park once and explore on foot.

Lodging here runs from chain hotels along the highway to design-forward boutique hotels and character-rich rentals in older neighborhoods. The food scene punches well above its size. Tourist Home Cafe is a local favorite for mornings, known for strong coffee, creative breakfasts, and pastries such as their churro-style donut. In the evening, many visitors pair Mother Road Brewery’s craft beers with wood-fired pizza from Pizzicletta next door, enjoying both in a shared space filled with conversation.

Flagstaff’s nightlife and gallery scene owes a lot to Northern Arizona University and Lowell Observatory, which bring students, scientists, and visitors together. Shops and galleries around Heritage Square and San Francisco Street offer outdoor gear, art, and local goods. From a driving perspective, Flagstaff sits roughly 80 minutes from the South Rim, about 90 minutes from Sedona, and close to sites like Sunset Crater and Wupatki National Monuments. That makes it a near-perfect base for two to four nights on many Arizona road trips.

Williams And The Grand Canyon Railway

About an hour south of the South Rim, Williams leans fully into its billing as the “Gateway to the Grand Canyon.” The main street, part of Historic Route 66, feels like a movie set with neon signs, classic diners, and motels that still show their mid-century roots. Strolling here in the evening, ice cream in hand, is almost as much a ritual as watching sunset from the rim.

Williams is also home to the Grand Canyon Railway, which runs daily to and from the South Rim. The experience starts at the historic depot and continues on board with musicians, costumed characters, and narration about the region’s history. Different service classes range from standard Pullman cars to First Class and a glass-domed observation car, where guests can gaze up at the sky and sideways at passing pines. Riding the train removes the stress of driving, parking, and navigating in the park, which is especially appealing for families and group organizers.

Many packages combine a night or two at the Grand Canyon Railway Hotel in Williams with a day trip or overnight at the rim, creating a tidy, car-free experience. Beyond the hotel, Route 66-themed motels and simpler lodges give plenty of options across budgets. Williams works particularly well for those without cars, parents with young children, and anyone who loves both trains and classic Americana.

Jacob Lake Inn: North Rim’s Essential Outpost

For North Rim trips, Jacob Lake Inn is far more than a pin on a map. Located at the junction of US-89A and AZ-67, about 44 miles from the North Rim entrance, it is the last full-service stop before the forest road climbs into the park. The main lodge building, with its heavy stone fireplace and knotty pine interior, feels like a mix of rural inn and summer camp.

Inside, the bakery draws travelers off the highway all day long. Pies with seasonal fillings and famous cookies often sell out by evening, and many repeat visitors plan their drives around a stop here. The attached restaurant serves hearty breakfasts, burgers, and comfort food that fits the cool forest setting. Outside, the gas pumps and small store provide last-chance fuel and basic groceries, which can be important in such a remote area.

Lodging options include simple motel rooms and older-style cabins, some with shared bathrooms, which adds to the camp vibe. There are no TVs in rooms and little to no Wi-Fi reaching the far corners of the property, which gently nudges guests toward the lobby, the porch, and conversations with strangers. On a North Rim road trip, evenings at Jacob Lake Inn often turn into informal trip-planning sessions, with maps spread on tables, slices of pie half eaten, and people trading tips on favorite overlooks and hikes.

Page, Arizona: Canyons, Curves, And Technicolor Wonders

Horseshoe Bend showing Colorado River's dramatic curve

Page might look like a simple service town when you first roll in, but it anchors some of the most photographed spots in the Southwest. Built originally to house workers on the Glen Canyon Dam, it now acts as a base for Horseshoe Bend, Antelope Canyon, Lake Powell, and scenic drives in almost every direction. For many Grand Canyon road trip plans, Page deserves at least two nights, not just a refuel stop.

The area also offers a strong connection to Navajo Nation lands and guides, which adds culture and context to the raw scenery. Guided hikes and boat tours frequently include stories, language, and traditions from people whose families have lived around these canyons for generations. For independent travelers using Discover It Yourself, Page provides both modern comforts and easy access to more remote viewpoints and water access points that would be hard to find without local knowledge.

Horseshoe Bend: The Iconic Meander

Horseshoe Bend has become one of the most recognizable bends of river anywhere. A short drive south of Page leads to a parking area with an entrance fee, and from there a 1.5-mile round-trip walk on a broad, sometimes sandy path brings you to the edge. Suddenly the ground just stops, and the Colorado River loops far below in a perfect horseshoe shape, framed by vertical cliffs more than 1,000 feet tall.

Because it is so famous, Horseshoe Bend can feel crowded at midday, especially in peak season. To sidestep that, plan for sunrise, when the air is cooler and the site is quiet, or late afternoon, when the angle of light adds depth and shadows. Once at the rim, it helps to walk a hundred yards or more to either side of the main viewing area. The views stay just as impressive, but the number of people in your frame often drops sharply, which is valuable for both photos and peace of mind.

Photography-wise, a wide-angle lens or smartphone ultra-wide setting helps capture the entire curve without leaning dangerously close to the edge. A polarizing filter can deepen colors and cut glare on the water. There are some railings now in central sections, but much of the rim remains open, so watching your footing and staying back from overhanging ledges matters, especially with children. For a different take, smooth-water rafting trips below the Glen Canyon Dam float around the base of Horseshoe Bend, allowing you to look up at the cliffs instead of down on them.

Antelope Canyon: Navigating The Slot Canyon Experience

Antelope Canyon, just east of Page on Navajo land, might be the most famous slot canyon in the world. Its narrow sandstone walls twist and flow like frozen waves, and when beams of sunlight lance down from above, the effect feels almost unreal. Access here is tightly controlled, and visiting requires a guided tour with an authorized Navajo operator, which helps protect both the canyon and guests.

The canyon is divided into two common sections used for tours:

  • Upper Antelope (“The Crack”) has a ground-level entrance, a relatively short, flat walk, and is known for dramatic light beams from roughly March through October, usually late in the morning and around midday.
  • Lower Antelope (“The Corkscrew”) is more physical, with staircases, steep ladders, and narrower sections that can challenge anyone with claustrophobia.

For both sections, it is smart to book tours at least two or three months ahead for peak season, especially if photography is a priority. Regular tours usually prohibit tripods, but smartphone cameras perform very well in the soft, reflected light. Spring and fall balance good lighting with smaller crowds, though any season can be rewarding with realistic expectations.

Lake Powell And Rainbow Bridge: Water-Based Adventures

Lake Powell stretches behind the Glen Canyon Dam in a maze of flooded side canyons, sheer walls, and sandy coves. From Page, marinas at Wahweap and Antelope Point act as gateways to boat tours, houseboat rentals, kayaks, and paddleboards. For many visitors, time on the water provides a welcome change after several days of rim views and hikes.

One of the standout water-based trips is the boat tour to Rainbow Bridge National Monument, often described as one of the largest natural stone bridges on Earth. The ride weaves through narrow arms of Lake Powell, where cliffs rise straight from the water and twist at every bend. After docking, a short, mostly flat walk leads to the base of Rainbow Bridge, which carries deep cultural meaning for several Native American tribes. Guides typically explain this significance, so respectful behavior here is important.

Another memorable outing is the smooth-water float on the Colorado River from the base of Glen Canyon Dam down to Lees Ferry. These trips use rafts on calm water and focus on scenery, not whitewater, which makes them suitable for families and mixed-age groups. Along the way, you can see petroglyph panels, soaring walls, and the underside of Horseshoe Bend. Spring and early summer often bring comfortable water levels and temperatures, while July and August can be very hot on exposed rock. Booking boat tours and rentals in advance is smart, especially on weekends and holidays, as capacity can fill quickly.

Sedona Extension: Red Rocks And Desert Adventures

Sedona sits about two hours south of the Grand Canyon South Rim, and driving into town feels like entering a natural amphitheater built from red stone. Towering buttes, spires, and cliffs glow at sunrise and sunset, while evergreen forests and the cool waters of Oak Creek weave through the lower elevations. For many travelers, including at least a day or two in Sedona turns a simple drive into a richer Arizona road trip.

What sets Sedona apart is the mix of outdoor adventure, art, and wellness all in one compact region. Short drives take you from trailheads to galleries to scenic overlooks, and the town’s restaurants and patios give plenty of options for regrouping after active days. For those arriving from Las Vegas with a Discover It Yourself 4×4, Sedona’s network of rougher back roads offers a natural playground, whether you book a guided tour or drive legal routes yourself with solid maps and caution.

Pink Jeep Tours: Off-Road Thrills In The Backcountry

The bright pink jeeps rolling through Sedona are hard to miss, and for good reason. These modified vehicles are built to handle steep rock ledges, uneven shelves, and tight squeezes that would stop most standard SUVs cold. Joining one of these tours is a fast way to reach terrain that would be risky to attempt without serious off-road experience and equipment.

The Broken Arrow tour is widely considered the signature outing. Over roughly two hours, drivers ease the vehicle up and down seemingly impossible rock steps, roll along narrow ridges, and pause often at dramatic viewpoints. The feeling of being tipped at a sharp angle while still securely strapped into a professional vehicle adds just enough tension to make the experience stick in your memory. Guides mix safety with storytelling, sharing geology facts, local history, and the stories behind famous formations.

Multiple stops at spots like Submarine Rock and Chicken Point give guests time to stretch, shoot photos, and take in the red rock layers from up close. Although the ride is safe, it is bumpy and jarring by design, so it is not recommended for anyone with recent back injuries or pregnancy concerns. Morning departures often bring cooler temps and softer light, which is better for both comfort and photography. For travelers in Discover It Yourself vehicles, these tours can complement your own driving by taking you into the roughest sections while you keep your personal 4×4 on more moderate routes.

Devil’s Bridge Trail: Sedona’s Signature Hike

Devil’s Bridge has become Sedona’s most photographed natural arch, and for good reason. The sandstone span is wide, tall, and flat enough to walk on safely if you have a good head for heights. The hike to reach it can be adjusted to fit different vehicles and energy levels, which makes it a flexible centerpiece for a day in the area.

From the main Devil’s Bridge trailhead, the hike is about four miles round-trip. The first part follows an old road and then a clear single-track trail through juniper and scrub forest with gradual uphill grades. A Discover It Yourself-style high-clearance 4×4 can shorten this distance by driving a rough section of Dry Creek Road to a closer trailhead, which cuts the walk roughly in half. This road is rocky, rutted, and often crowded with rental jeeps, so comfort with off-pavement driving is important if you choose this option.

The final stretch of the hike involves steep natural rock stairs and some light scrambling with hands, which can be challenging when crowded. At the top, the arch appears just below you, with a wide, flat top and big drop-offs on all sides. Walking onto it is optional, and many people are happy to photograph others from a safe distance.

For this hike, bring:

  • At least one liter of water per person
  • Sturdy footwear with good traction
  • A hat and sun protection, even on cooler days

To avoid long lines on the arch and heavy heat, it is wise to reach the parking area near sunrise, especially in warm months. Those still wanting more walking can combine Devil’s Bridge with nearby trails like Fay Canyon or Boynton Canyon for a full hiking day.

Downtown Sedona And Culinary Highlights

After dusty tires and trail miles, Uptown Sedona offers a very different kind of exploring. The main drag has galleries, crystal shops, outdoor gear stores, and plenty of patios for people-watching. Just south, the Tlaquepaque Arts and Shopping Village gathers higher-end Southwestern art, sculpture, and boutiques in a shaded, courtyard-style complex that feels made for slow strolling.

For food and drinks, 89 Agave Cantina stands out as a lively spot to end the day. Its outdoor patio looks onto the red cliffs, and the menu leans into Southwestern flavors, including prickly pear margaritas made from local cactus fruit and Mexican street corn covered in spices and cotija cheese. Other strong choices include Elote Cafe for refined Mexican dishes, Hideaway House for Italian with a view, and Oak Creek Brewery for casual pub fare and local beer.

Sedona’s reputation as a spiritual and scenic hub comes through strongly at sunset. Many locals and visitors head to Airport Mesa or the area near the Chapel of the Holy Cross to watch the cliffs catch late light. Lodging ranges from simple motels and chain hotels to upscale resorts with pools and spa services, so it is easy to match comfort levels and budgets for groups or special trips.

Zion National Park Extension: Towering Cliffs And Iconic Hikes

Zion National Park sits only a few hours from the Grand Canyon North Rim, and pairing the two makes a powerful combination. Where the canyon asks you to look down into carved rock, Zion asks you to look up at tall sandstone walls that glow orange and gold. That contrast keeps a longer Southwest road trip from feeling repetitive, even when it covers multiple parks.

Because Zion is popular and its main canyon is narrow, the park uses a shuttle system to manage traffic for much of the year. Once you understand how that system works, it becomes an asset rather than a hassle, moving you between trailheads and viewpoints while you relax and take in the views. For travelers starting and ending in Las Vegas with Discover It Yourself, Zion fits naturally into a loop that includes either the North Rim, the South Rim, or both.

The Zion Canyon Scenic Drive And Shuttle System

From roughly March through November, private vehicles are not allowed on the Zion Canyon Scenic Drive. Instead, visitors park near the main visitor center or in the town of Springdale and ride a free shuttle bus into the canyon. Buses arrive every few minutes during busy times and stop at nine key points along the road, each close to trailheads or viewpoints.

Parking at the visitor center often fills by mid-morning, especially on weekends and holidays. Staying in Springdale and walking or taking the town shuttle to the park entrance is one of the easiest ways to avoid parking stress. Once on the park shuttle, you can hop off at stops such as Court of the Patriarchs, where three towering rock formations dominate the view, or The Grotto, which serves as the starting point for both the Angel’s Landing and West Rim trails. Weeping Rock, when open, offers short, steep paths to hanging gardens and dripping cliffs, while the Temple of Sinawava at the end of the line provides access to the Riverside Walk and the beginning of the famous Narrows hike.

The ride itself is part of the experience, with open views up and down the canyon and helpful narration. In winter, when the shuttle is not running, you can drive your own vehicle into the canyon, which changes both the pace and the crowd levels. Snow on the cliffs and frozen seeps create a very different feel that is attractive for photographers and repeat visitors.

Angels Landing: The Thrilling Ascent

Angel’s Landing is one of the most talked-about hikes in the national park system, and it earns both its praise and its warnings. The full hike is about 5.4 miles round-trip with roughly 1,500 feet of elevation gain, starting from The Grotto shuttle stop in Zion Canyon. It begins on a paved path that climbs steadily through a series of long switchbacks, then levels off briefly in a shady canyon known as Refrigerator Canyon.

Soon after, a tight set of 21 short switchbacks called Walter’s Wiggles gains more height in a hurry, leading to a broad area known as Scout Lookout. Many hikers decide this is far enough, as the views from here are already outstanding and the most exposed section still lies ahead. Beyond Scout Lookout, the famous chained section begins, where a narrow sandstone spine leads out toward the final viewpoint, with steep drop-offs on both sides. Fixed chains bolt into the rock at critical points, and hikers often use both hands to steady themselves, especially on crowded days.

Because of its difficulty and popularity, a permit system now controls access beyond Scout Lookout. Keep these basics in mind:

  • Permits are assigned by lottery, both months ahead and in a day-before system.
  • Solid hiking boots with excellent grip are strongly recommended.
  • Pack plenty of water and snacks; there is no water on the trail.

Those with serious fear of heights, heart issues, or very young kids should skip the chains section and treat Scout Lookout as the turnaround spot. Starting early, often before 7 a.m., helps with heat and reduces how many people you must pass on narrow sections, which improves both safety and enjoyment.

FAQs

How Many Days Do I Need For An Iconic Road Trips Grand Canyon Adventure?

Most travelers are happiest with at least four to six days if they want more than a fast photo stop at the South Rim. That amount of time allows for a night or two near the South Rim, a detour to Page or Sedona, and one other highlight such as Grand Canyon West or the North Rim. Adding Zion or a broader Arizona road trip with Route 66 increases the ideal length to eight to ten days. Shorter visits are possible, especially from Las Vegas, but more time gives you room for weather, rest, and spontaneous side drives.

What Is The Best Season For A Grand Canyon Road Trip?

Spring and fall tend to balance pleasant temperatures, open facilities, and manageable crowds. Late April through early June and mid-September through October are especially good windows for a Grand Canyon national park road trip. Summer brings long daylight but also heat at lower elevations and heavy visitation, especially at the South Rim and popular hikes. Winter can be magical around the South Rim, with snow-dusted cliffs and quiet trails, but some roads and services may close, and the North Rim shuts down entirely due to snow.

Should I Visit The South Rim, North Rim, Or West Rim First?

If it is your first time and you have only one rim on the schedule, the South Rim is usually the best starting point, thanks to its famous views and wide range of services. If calm, forested settings and cooler air matter more than crowds and infrastructure, the North Rim might fit better, especially from May through October. Grand Canyon West works very well as a first stop from Las Vegas, especially for those excited about the Skywalk and a strong tribal presence. With more days and a good route, you can design a loop that touches all three.

Do I Really Need A 4×4 For A Grand Canyon Road Trip?

You do not need a 4×4 to reach main park areas, stay in lodges, or enjoy classic viewpoints. Paved highways and park roads handle standard rental cars just fine for the main South and North Rim routes. A premium 4×4 becomes valuable when you want to explore rougher side roads, quiet desert overlooks near Las Vegas, or backcountry approaches around Sedona and Page. Travelers who choose Discover It Yourself vehicles gain access to curated coordinates and off-the-main-route stops that would be off-limits or unwise in a low-clearance car.

How Far In Advance Should I Book Lodging And Key Activities?

For peak season trips that include in-park lodges, North Rim cabins, or top experiences such as Antelope Canyon tours and the Grand Canyon Railway, aim to book three to twelve months ahead. The Grand Canyon Lodge on the North Rim and some South Rim hotels can sell out more than a year in advance. Guided tours like Pink Jeep outings, rafting, and Rainbow Bridge boat trips also fill quickly on holiday weeks and weekends. If your schedule is flexible and you are visiting in shoulder seasons, you can sometimes find good rooms closer to arrival, but planning early always gives you more control.

Conclusion

An iconic Grand Canyon road trip is not about following a perfect script. It is about having the right mix of structure and freedom so you can chase first light at Mather Point one morning, watch stars over the North Rim another night, and decide on the spot to take a side drive down a promising two-lane road. With smart planning and the insights in this guide, you can turn a simple park visit into a rich, multi-stop experience that fits your style and your group.

Choosing the right gateway city, piecing together South, North, and West Rim experiences, and blending in stops like Sedona, Page, Route 66, and Zion gives the trip layers. Industry professionals and independent travelers alike can use the ideas here as building blocks, adjusting driving days, trail lengths, and hotel choices to match fitness, comfort, and curiosity. A thoughtful mix of must-see highlights and less-known pauses creates space for both shared moments and quiet reflection.

The vehicle you choose is the final piece of the puzzle. A premium 4×4 from Discover It Yourself, paired with coordinates instead of hand-holding, lets you move beyond the usual stops without giving up safety or comfort. Whether the goal is a proposal on a remote overlook, a team retreat far from meeting rooms, or a long-delayed personal adventure, the Grand Canyon region has more than enough road, rock, and sky to match. Now the map is in your hands, the keys are on the table, and the open road to the canyon is waiting.

White salt flats stretch farther than a wide‑angle lens can see, evoking the raw beauty that shapes our attitudes toward wilderness and remote landscapes. Sand dunes glow like molten gold at sunrise. Cracked earth, jagged ridges, and distant peaks frame a valley that is the hottest, driest, and lowest national park in the lower 48. For anyone who loves a camera, this is not just another stop. This is one of the most iconic road trips through Death Valley and the wider American Southwest.

Instead of crowded sidewalks and neon noise, picture leaving the Las Vegas Strip behind and trading it for empty desert highways, surreal salt patterns, and night skies so dark the Milky Way looks painted on. A Death Valley road trip feels like pure freedom for content creators. There are endless spots for photos, reels, long‑form video, or that one hero shot that makes your feed stand out from the usual tourist snaps.

The real magic comes when the trip is self‑guided. No bus schedule, no guide rushing the group back into a van. Just keys, coordinates, and the time to wait for perfect golden‑hour glow at Badwater Basin, to run barefoot along cool sand at Mesquite Flat at dawn, or to shoot a time‑lapse from Zabriskie Point into the stars. With Discover It Yourself, that is exactly the idea. You get premium 4×4 vehicles plus curated GPS points for both headline locations and quiet corners most visitors never reach.

Keep reading to map out a complete Death Valley itinerary, from the first miles out of the city to Badwater Basin, Artist’s Drive, Ubehebe Crater, Rhyolite Ghost Town, and more. By the end, you will have a clear plan for turning this California desert road trip into a standout project, with the freedom and privacy to create on your own terms.

“You don’t take a photograph, you make it.”
— Ansel Adams

Key Takeaways

  • Best Season: October through April brings safer temperatures for long shooting days. Light is softer, heat is manageable, and sunrise or sunset sessions are easier to enjoy. Late winter and early spring can even bring wildflower carpets after wet seasons.
  • Vehicle Choice: A standard car works for the main Death Valley National Park drive, including the famous paved stops. A high‑clearance 4×4 opens remote tracks, dry lakebeds, and seldom‑visited canyons that often become your most original content spots.
  • Self‑Guided Freedom: Exploring on your own schedule means you can skip harsh midday light, come back when shadows look better, and avoid crowds by circling back later. That flexibility helps your project feel intentional instead of rushed.
  • Easy Access From Las Vegas: Death Valley sits about two hours from the Strip, perfect for a weekend or multi‑day content sprint. Extra time lets you mix daytime drives, blue‑hour filming, and astrophotography. With smart planning, one trip can fuel weeks of posts.
  • Why Discover It Yourself: Discover It Yourself removes guesswork while keeping you independent. You get premium 4×4 vehicles plus secret, GPS‑based locations to stack your route with both must‑see icons and quiet, hidden scenes. That blend of support and freedom fits creators who want standout work instead of copy‑and‑paste shots.

Planning Your Death Valley Road Trip Adventure

4x4 vehicle on Death Valley highway

Good planning turns Death Valley from a quick sightseeing stop into one of those iconic road trips where almost every stop is usable content. The first big decision is timing.

From October through April, daytime highs usually sit in the 60s to low 80s Fahrenheit. That range lets you shoot, hike, and scout without risking your health, especially if you pace yourself and drink plenty of water. Early spring, especially March and April, adds a bonus: in years with strong autumn and winter rain, the desert floor can burst into color with wildflower “superblooms.” For creators, that contrast between bright flowers and harsh desert textures looks incredible on both photo and video.

From May through September, heat is on a different level. It is not just “hot.” Afternoon temperatures often climb above 120°F, which shrinks safe outdoor shooting down to dawn and dusk. Midday hikes or extended filming during that season can be dangerous, so most people keep activities short and stay near their vehicle or lodging.

Vehicle choice shapes the kind of Death Valley road trip you can build:

  • A typical sedan or crossover can handle the main scenic drive and big paved stops such as Badwater Basin, Zabriskie Point, Mesquite Flat Sand Dunes, and Artist’s Drive.
  • If your goal is a broader American Southwest road trip with more remote set‑ups, a high‑clearance 4×4 opens the door to rougher tracks, including places like the Racetrack Playa and Titus Canyon.

That is exactly where Discover It Yourself stands out, with premium 4×4 vehicles prepared for these conditions and routes designed with real‑world filming in mind.

Packing should cover both safety and content:

  • At least one gallon of water per person per day, more if hiking or filming in exposed areas
  • Wide‑brimmed hat, strong sunscreen, UV‑blocking sunglasses, and light, breathable clothing
  • Sturdy shoes for sharp rock and deep sand, plus a warm layer for cool nights
  • Offline maps on your phone and a paper map for backup, since cell service is limited
  • Spare camera batteries, empty memory cards, a solid tripod, and a simple cleaning kit for dust and salt
  • A small cooler with snacks so you can stay in the field longer without returning to town

Fuel up completely before entering the park, since gas at Furnace Creek, Stovepipe Wells, and Panamint Springs costs more and stations are far apart. When logistics are nailed down early, you can focus on framing, light, and story instead of worrying about where to sleep or how far the remaining gas will take you.

Where To Stay: Base Camps For Your Death Valley Adventure

Choosing a base is not just about comfort. It directly shapes how easily you can chase sunrise, sunset, and stars. Staying inside the park means rolling out of bed and reaching Zabriskie Point or the Mesquite Flat Sand Dunes in minutes, not hours. For creators, that can be the difference between catching first light and arriving after the best color fades.

At Furnace Creek, The Oasis at Death Valley gives two very different moods:

  • The Inn at Death Valley is a 4‑diamond historic hideaway with palm trees, spring‑fed pools, and a calm setting that works well when you need a quiet room to edit or upload.
  • The Ranch at Death Valley feels more relaxed and family‑oriented, with open grounds and easier price points.

Both offer reliable power, Wi‑Fi, and air‑conditioning, which makes long editing nights far more manageable after a hot Death Valley National Park drive.

For a more stripped‑back stay, Stovepipe Wells Village Hotel sits close to the Mesquite Flat Sand Dunes. That spot is ideal if you want sunrise and sunset dune sessions without long drives on either side. On the western edge of the park, Panamint Springs Motel & Tents offers a small, remote outpost feel. The views are big, the services basic but welcoming, and the night sky is outstanding.

Camping turns the trip into a full immersion. Furnace Creek and Stovepipe Wells campgrounds keep you central to most Death Valley must‑see stops while dropping you right under a Gold Tier Dark Sky. That means Milky Way arcs over the tent, star trails above silhouetted ridges, and the chance to start shooting within steps of your sleeping bag. If you are building astrophotography into a desert road trip USA project, this is hard to beat.

If budget, variety, or extra amenities matter more, gateway towns work well:

  • Beatty, Nevada – quick access to the park’s east side plus simple motels, food, and gas
  • Lone Pine, California – near Highway 395 with jaw‑dropping views of the Alabama Hills and Mount Whitney
  • Death Valley Junction – home to the historic Amargosa Opera House & Hotel with a slightly surreal, old‑West atmosphere

Wherever you choose, book early for peak months, especially March and April, when both wildflowers and mild weather attract more visitors.

The Drive To Death Valley: Key Stops Along The Way

For many creators, the drive in becomes as important as the main Death Valley road trip itself. Instead of racing straight to Furnace Creek, treating the approach as part of the adventure adds more variety to your project. Each extra stop gives a fresh setting, new colors, and different textures for your feed or video timeline.

Coming from Los Angeles on CA‑14, the first standout stop is Vasquez Rocks Natural Area Park near Agua Dulce. Its sharp, tilted rock fins are instantly recognizable from classic films and TV, from Star Trek to modern sci‑fi. The shapes are perfect for forced‑perspective shots, character portraits, or fun short‑form skits. Because the formations rise right from the parking area, this can be a quick content grab or a longer scouting walk.

Farther north, Saddleback Butte State Park brings in groves of Joshua trees and wide views over the Antelope Valley. Even a brief stop near the visitor center can yield strong images, especially if scattered clouds throw moving shadows across the desert floor. If time and energy allow, the hike to the summit offers a 360‑degree view that sets up sweeping wide‑angle compositions, even if you are only shooting from the ground.

Red Rock Canyon State Park, farther along, feels like a preview of Death Valley’s colorful cliffs. Striped red and white walls tower over the road, and formations with names like Turk’s Turban and Camel Rock give easy focal points. This section of the route works nicely for car‑based content too, especially if you want to show your rig framed against bold rock bands.

Approaching from the west on Highway 395, consider detouring to the Trona Pinnacles. More than 500 tufa spires rise from a dry lakebed, some 140 feet tall, creating an eerie, almost alien setting that fits cinematic B‑roll or fashion shoots. The five‑mile access road is rough and unpaved, so a high‑clearance vehicle is helpful, which is where a Discover It Yourself 4×4 really pays off.

Near Lone Pine, the Alabama Hills deliver rounded, golden rock piles backed by the jagged crest of the Sierra Nevada. Iconic dirt roads lead straight toward Mount Whitney, ideal for symmetrical car shots, walking clips, or low‑angle footage captured with a gimbal. Short walks to arches like Mobius Arch and Boot Arch give natural frames for sunrise or sunset. If time allows, driving up Whitney Portal Road adds cool, tree‑lined switchbacks and alpine scenes that contrast sharply with the desert below. By the time you roll east toward Death Valley, you will already have a rich mix of settings on your cards.

Death Valley’s Iconic Valley Floor Attractions

Mesquite Flat Sand Dunes at sunrise

Once you drop onto the main valley floor, the scale hits hard. This central zone holds some of the most famous scenes in any California national park road trip, and it is where you can build entire days of shooting without driving far.

Badwater Basin is the headliner. At 282 feet below sea level, it is the lowest point in North America and a core stop on almost every Death Valley itinerary. From the parking lot, a boardwalk gives a first glimpse of the salt flats, but the real magic sits farther out. Walking 15 to 20 minutes brings you to untouched hexagonal salt patterns that stretch to the horizon. Ultra‑wide compositions, overhead shots, tiny‑subject‑in‑a‑big‑world frames, and playful perspective tricks all work brilliantly here.

Heat and glare are serious, though. The white ground reflects sunlight straight back at you, so strong sunglasses, sunscreen, and plenty of water are not optional. In summer, afternoon ground temperatures can climb far higher than the air reading, which makes midday visits dangerous. Aim for early morning or late evening, when the sun sits low and salt textures stand out in side light.

North of Furnace Creek, near Stovepipe Wells, the Mesquite Flat Sand Dunes create a sea of curves and ridges. The tallest dunes rise about 100 feet, but what matters most is the light. At sunrise and sunset, every ridge casts a crisp shadow, turning the dunes into patterns of gold and deep blue‑gray. For clean, footprint‑free scenes, expect to hike 30 to 60 minutes out into the field. Walking in loose sand feels harder than the distance suggests, so plan snacks, water, and extra time.

Harmony Borax Works, close to Furnace Creek, adds human history to your Death Valley travel guide. Crumbling adobe walls, rusted equipment, and a preserved 20‑mule team wagon tell the story of borax mining in the 1880s. Short interpretive signs help you understand what you are seeing, which makes it easy to script voice‑overs, captions, or educational reels. Mixed with wide shots of the nearby valley, it adds context and character to a reel of pure desert scenes.

Together, these valley floor locations form the core of many Death Valley scenic routes. The creative challenge is not finding subjects; it is pushing yourself to try unusual angles: tight salt‑crystal details, reflections in rare rain pools, footprints as leading lines, or silhouettes against glowing dunes. Staying longer than the average visitor, and coming back in different light, often leads to your strongest work from the trip.

Death Valley’s Spectacular Scenic Drives And Colorful Canyons

Colorful mineral deposits at Artists Palette

Some of Death Valley’s best content comes straight out of the car window. The park’s paved drives and short hikes give fast access to bright color and tight canyons without demanding full‑day treks. That mix is perfect if your plan is to cover several themes in one tight Death Valley itinerary.

Artist’s Drive is a nine‑mile one‑way loop that feels like driving through a painting. The road twists and dips through hills stained with pastels and deep tones created by mineral oxidation, revealing nature’s palette in ways that transform landscapes into living art. The highlight is Artist’s Palette, where pink, green, yellow, and purple bands all meet in one intensely colorful bowl. Parking areas let you step out and walk into the hills for close‑up work. Late afternoon often shows the colors at their richest, as low sun pulls out every stripe and fold.

For creators building a Death Valley scenic drive montage, running this loop at different times of day can be smart. Early morning gives softer, cooler tones. Later light reveals warmer reds and deep purples. Close details of cracked clay, slanted layers, and color transitions play well in vertical video and macro shots.

Golden Canyon Trail, off Badwater Road, pulls you off the pavement and into a narrow, winding canyon. Tall golden walls rise on both sides, and sunlight bounces between them to create pools of warm, glowing shade. You can keep things simple with a short out‑and‑back walk or commit to a longer loop that reaches Red Cathedral and ties into the Zabriskie Point trailhead. Either way, the space is full of texture, leading lines, and natural frames.

The main CA‑190 highway also deserves time in any Death Valley National Park drive plan. Entering from the west, it snakes down from Towne Pass toward the valley floor in a series of bends that are perfect for driving shots and timelapses. Just beyond Panamint Springs, the road suddenly straightens into a long, ruler‑like line that cuts across a huge basin. A centered composition of a car or person on that stretch has become a classic image from desert road trips in the USA, and for good reason. It clearly shows the scale and emptiness of this place.

Panoramic Viewpoints: Death Valley From Above

Zabriskie Point badlands at dawn

To really understand how huge Death Valley is, you need to climb above it. The elevated viewpoints around the basin give sweeping scenes that tie together salt flats, ridges, and distant peaks in one frame. For a creator, these are the spots that deliver strong establishing shots for any video or photo set.

Zabriskie Point may be the most famous stop in the park. A short paved path climbs to a main viewpoint that overlooks a maze of golden badlands, sharp ridges, and carved gullies. At sunrise, the first rays catch the highest ridges while valleys remain in shadow, creating strong contrast. At sunset, the entire view warms into soft oranges and pinks that feel almost unreal. On clear, moonless nights, this same spot becomes a go‑to for Milky Way astrophotography as part of a longer Death Valley road trip.

Because Zabriskie Point is so well known, it can get crowded at peak times. Arriving well before sunrise often means better positions, quieter audio, and cleaner frames without people. Exploring a bit farther along the paths, while obeying signs and staying on durable surfaces, can reveal less‑used angles.

Dante’s View climbs far higher, to a lofty perch above Badwater Basin. From the parking area, you can look straight down onto the salt flats and across to the Panamint Range beyond. On very clear days, the zone between here and the Sierra Nevada lets you see both the lowest point in North America and Mount Whitney, the highest peak in the contiguous United States. Short paths along the ridge give options for foreground rocks, tiny human figures, or car shots framed against the valley below. The spot also carries a fun film connection, having been used in the original Star Wars as the overlook above the Mos Eisley spaceport.

Farther north, Ubehebe Crater showcases Death Valley’s volcanic side. The main pit is about half a mile across and 600 feet deep, formed by a powerful steam explosion when magma hit groundwater. From the parking lot on the rim, you can shoot straight down into the dark, loose cinders that line the walls. A loop trail around the rim gives changing perspectives, while a very steep path leads to the floor for creators who want a more immersive view. Just remember that climbing back out is strenuous, especially with gear.

Each of these viewpoints helps your audience grasp the scale of one of the most iconic road trips in America. Wide, layered compositions from above set the stage for the tighter scenes you capture on the valley floor.

Beyond The Main Loop: Hidden Adventures And Ghost Towns

Historic Rhyolite ghost town ruins

Most visitors stick to the central loop between Furnace Creek, Badwater, Mesquite Flat, and Zabriskie Point. That loop is amazing, but stepping just beyond it adds depth and surprise to any Death Valley travel guide you are building. Ghost towns, outdoor art, cool canyons, and even a waterfall all help your project stand out.

Just outside the park’s eastern edge near Beatty sits Rhyolite Ghost Town. In the early 1900s it was a booming gold‑rush community. Now, broken walls of a three‑story bank, the remains of a train depot, and the famous bottle house are all that remain. Shooting here feels like working on a ready‑made movie set. With the right angles, it is easy to build scenes that mix old stone, rusted metal, and open desert.

Next door, the Goldwell Open Air Museum adds an unexpected creative twist. Large outdoor sculptures, including a ghostly take on The Last Supper, stand against wide desert backdrops. For creators, this mix of art and raw desert works well in both still photos and looping video, especially in low golden light.

Beatty itself is a handy and character‑filled gateway town. It has gas, groceries, motels, and a small casino, all wrapped in a classic Nevada small‑town look. Including even a few shots here helps show the human side of a California desert road trip instead of only empty scenes.

On the park’s western side, Darwin Falls brings a complete change of mood. A short hike follows a small stream through a narrow canyon lined with willows and cottonwoods. At the end, a year‑round waterfall tumbles into a shady pool. The contrast between this green pocket and the dry rock outside makes for strong before‑and‑after storytelling, especially in video.

For more textured rock close‑ups, Mosaic Canyon near Stovepipe Wells offers polished marble‑like walls and sections where small stones are cemented together into natural mosaics. The four‑mile round trip can be adjusted to your time and energy, but even a shorter walk gives plenty of visual interest.

With a capable 4×4 and enough preparation, you can also look toward remote targets like the Racetrack Playa, famous for its “sailing stones.” Those tracks demand serious planning and careful driving, which is another area where Discover It Yourself vehicles and guidance really help.

Essential Safety And Logistics For Death Valley Explorers

Creating strong content here starts with staying safe. Death Valley is beautiful and harsh at the same time. Treating it with respect keeps a dream project from turning into an emergency. When planning iconic road trips in Death Valley or nearby regions, heat should be your first concern.

From late spring through early fall, avoid hard hikes and extended filming after about 10 a.m. Even in cooler months, heavy exertion in direct sun can drain you quicker than expected. Aim for at least one gallon of water per person per day as a base, and add more for hikes. A good rule is one liter for every two miles of walking. Watch for signs of heat stress in yourself and anyone with you, such as dizziness, headache, or confusion.

Fuel planning is almost as important as water. Gas is available at Furnace Creek, Stovepipe Wells, and Panamint Springs, but prices are high and distances are long. Topping off in Las Vegas, Pahrump, Beatty, or Lone Pine before you enter the park gives more breathing room. Running low on fuel deep in the desert, far from help, is more than an inconvenience — it can be dangerous during high heat or at night.

Navigation works best with a mix of tools:

  • Download offline maps before leaving coverage
  • Keep a printed park map in the car where you can grab it quickly
  • Let a friend or family member know your rough route and check‑in time
  • Be cautious on dirt roads, especially after storms or in summer heat

The environment here is fragile, much like glaciers’ contributions to ecosystems worldwide, where delicate natural systems require careful stewardship to maintain their integrity. Thin cryptobiotic soil and delicate desert plants can take decades to recover from a single set of boot prints or tire marks. Staying on marked trails and established roads protects the park and keeps your content ethical. Trash, including tiny things like tissue or snack wrappers, should go back out with you. Flash floods are another real risk in narrow canyons; if rain is in the forecast anywhere uphill, skip slot canyons for that day.

Park entrance fees can be paid at self‑service kiosks or at the Furnace Creek Visitor Center. Stopping at the visitor center early in your trip is a smart move. Rangers there can update you on road closures, weather patterns, and current conditions. With safety and logistics handled, you are free to concentrate on storytelling, framing, and capturing the feel of one of the best road trips California has to offer.

“Wilderness is not a luxury but a necessity of the human spirit.”
— Edward Abbey

How Discover It Yourself Shapes Your Death Valley Adventure

Most guided tours through Death Valley follow the same script. The bus stops, the guide talks, everyone gets ten minutes to snap photos, then it is back on the road. That model rarely lines up with how content creators like to work. Discover It Yourself was built for a different style of adventure, one where independence, privacy, and creative control come first.

The foundation is a fleet of premium 4×4 vehicles. These are not just for comfort. They are what let you reach remote tracks, rougher gravel roads, and lesser‑known overlooks that standard rental sedans should not attempt. That means access to spots near places like Titus Canyon, remote badlands, or dry lakebeds where tire tracks are rare and you can film in complete calm.

What really sets the experience apart is how information is shared. Instead of a guide talking over a microphone, you receive curated coordinates and route details ahead of time. Those points include famous Death Valley must‑see stops and a set of handpicked viewpoints and side roads around the Las Vegas region. You still make all the choices — which places to prioritize, how long to stay, and when to circle back all remain in your hands.

For creators, that freedom is gold. You can plan a Death Valley road trip that lines up with your content goals:

  • Shoot a proposal at sunset far from crowds
  • Build an anniversary film that moves from dunes to stars to campfire
  • Spend quiet hours capturing time‑lapses without a group schedule pressing you

Because there is no guide and no group, you also keep full privacy. You can record voice‑overs on the spot, redo takes as often as needed, set up tripods without bumping elbows, and share personal moments without an audience. Discover It Yourself gives you the keys, the right vehicle, and insider information. The rest of the story belongs to you.

Conclusion

Death Valley is a place of extremes. It holds the record for hottest air temperature, drops to 282 feet below sea level at Badwater Basin, and covers more than three million acres. Those numbers are impressive, but for creators, what matters more is how this region feels. Empty highways, salt flats that seem endless, dunes that glow at sunset, and night skies thick with stars all combine into a setting that can feel otherworldly.

Few trips offer this much variety within an easy drive from Las Vegas. In roughly two hours, you can go from busy casinos to a quiet desert road trip in the USA where silence is the loudest sound. It works just as well for first‑time adventurers as it does for seasoned shooters building a new series or client project. A self‑guided approach lets you chase the kind of light and mood that fits your style instead of rushing from stop to stop.

As you drive, climb, and explore, the experience does more than fill memory cards. It sharpens how you see light and form. It pushes you to work with harsh conditions and fast‑changing color. It encourages a deeper connection with the American Southwest, far from crowded sidewalks and scripted attractions.

If your goal is to step away from repetitive tourist content and create something that feels true to your own voice, Death Valley is an ideal stage. With careful planning, respect for safety, and the right partner providing 4×4 capability and curated coordinates, your next road trip can be both an unforgettable adventure and a powerful creative project. When you are ready to trade neon for salt flats, Discover It Yourself is ready with the keys.

FAQs

What Is The Best Time Of Year For A Death Valley Road Trip?

The best window for a Death Valley road trip runs from October through April. During these months, daytime highs usually range from the 60s to low 80s Fahrenheit, which makes exploring and filming far more comfortable. March and April are especially appealing, since they may bring wildflower blooms after wet winters. From May to September, temperatures often exceed 120°F, limiting safe outdoor activity to early morning and late evening. Winter nights can turn cold, so pack layers.

How Long Does It Take To Drive From Las Vegas To Death Valley?

The drive from the Las Vegas Strip to the Furnace Creek Visitor Center is about 120 miles and usually takes around two hours without stops. That short distance makes Death Valley National Park ideal for weekend escapes and focused multi‑day content trips. If you add side visits to places like Rhyolite Ghost Town, Beatty, or other desert viewpoints, expect the drive to stretch longer in the best possible way. Plan extra time for photo stops, since the scenery becomes interesting long before the park entrance.

Do I Need A 4×4 Vehicle To Explore Death Valley?

You do not need a 4×4 to see the classic highlights. A standard car can reach Badwater Basin, Mesquite Flat Sand Dunes, Zabriskie Point, Dante’s View, and Artist’s Drive on paved roads. However, a high‑clearance 4×4 greatly expands your options. It allows safer access to rougher roads leading toward areas like the Racetrack Playa, Titus Canyon, and other remote zones that offer rare, crowd‑free scenes. Discover It Yourself specializes in premium 4×4 rentals paired with curated coordinates, which is ideal if you want to reach those out‑of‑the‑way spots. Some nearby unpaved routes, such as the road to Trona Pinnacles, can be driven in a standard SUV if you go slowly and watch road conditions.

What Should I Pack For A Death Valley Road Trip?

Start with safety essentials:

  • At least one gallon of water per person per day
  • Strong sunscreen, a wide‑brimmed hat, and UV‑blocking sunglasses
  • Sturdy, closed‑toe shoes and light, breathable clothing
  • A basic first‑aid kit, extra snacks, and a flashlight or headlamp
  • Offline maps on your phone plus a paper map as backup

Creators will also want extra camera batteries, large memory cards, a lightweight tripod, and a small cleaning kit to handle dust and salt. Layered clothing helps you handle big temperature swings between hot afternoons and cool nights.

Where Should I Stay During My Death Valley Adventure?

For maximum golden‑hour access, staying inside the park near Furnace Creek, Stovepipe Wells, or Panamint Springs works best. Hotels at The Oasis at Death Valley and Stovepipe Wells provide comfort, power, and Wi‑Fi for editing, while nearby campgrounds offer the most direct access to night skies and dawn shoots. Gateway towns like Beatty, Lone Pine, and Death Valley Junction give more budget options and added amenities while adding their own local flavor. Whichever base you choose, book well ahead for peak season in March and April. Matching your lodging to your planned shooting zones will cut drive time and keep more of each day focused on creating.